I've had the urge to make tofu for a little while now, and with my spare time in between quarters, I found the opportunity. Tofu, a delight for many vegetarians, non-vegetarians, and most Asian cultures, is one of my favs. It's such a simple staple that can go into virtually anything and take the flavor of everything. It's a really nice blank slate to start with that can be transformed in many dishes. Some don't care for it, but I think that's like saying you don't like bread. Tofu itself comes in various forms and textures and you can even get it flavored both sweet and savory. mmmm... I love it.
Tofu is in many ways really similar to cheese. You start with a milk, add a chemical to it to separate it into curds and whey, and then squeeze most of the liquid whey out. The curds squished together make tofu or cheese. The biggest difference is that tofu has no live bacteria in it and you eat it right away. Oh and when making tofu, you also have to make the milk first... from soybeans.
The website that I got the directions from is
this one, the same one that gave me the so-far-yet-to-successful Kasutera cake. Even though you could read it there, I'll explain what I did here anyway.
Ok, so first you start with a pound of dried soybeans. NOT edamame. The dried white ones you can get in bulk. I started with organic, hoping that means they were not involved with Monsanto. (Boooooo!) I washed them and left them to soak in water overnight. In the morning, they were nice and soft (not cooked soft, but not rock hard anymore) and back to their original size. I rinsed them out again.
Then I threw them in a food processor with just enough water to cover them and pureed them. I would recommend using a blender for this, but our blender sucks balls so I had to use the food processor. It was kinda messy, and I had to process them in 4 separate batches. But that was ok, because you have to make the soymilk in two batches, unless you have a giant stockpot. I mean really giant, like one that could hold 2 gallons of liquid easily. Who has one of those?
So take half your pureed soybeans (about 4 cups), which now look nice and white and gooey, and put them in the stock pot with about 14 cups of water and set it on medium low heat. (It helps to have the water already hot when you throw the white goo in, just for time's sake.) You're going to want to cook this for about 30 minutes, stirring every few minutes, but you
can't leave it. It
will foam
over. Several times. Each time it threatens to do so, you can either take it off the heat each time to let it simmer down, or add a half cup of cold water by sprinkling it over the foam. I did both.
 |
| Watch out! Here it comes! |
Here it is, threatening to boil over. It's ok, the foam will go away eventually, I promise. Here's proof:
 |
| See? |
After it has cooked for about 30 minutes, the foam will go away, and you'll be left with soy milk that's ready to be separated from the soy pulp. I lined a colander with cheese cloth and placed that over a large bowl to catch the milk. I repeated this whole process again with the other half of the soybean puree and was left with about a gallon of fresh soymilk.
The pulp that you're left with is called okara and can be used for cooking. I'm sure my next blog will be something about a cool thing that I did with it. It's not good to eat on it's own, though the chickens love it. (Don't worry, Mabel got to try some before she died.)
 |
| 250 degree oven for 30 minutes, stirring every 5 minutes. |
I dried half of the okara in a low temp oven and threw it in the freezer, because I knew I wouldn't be able to use it all before it went bad.
 |
| Milky... |
Back to the milk. You can save some to drink if you like soy milk, but I don't, so we're moving right along. The milk went right back into the rinsed stockpot and back onto the stove. (Now there technically was an intermission of a night here since I took two days to make this, but we'll pretend this all happened in one day, k?) For the next step, you want the milk to be 165 degrees. This may mean you need to wait for it to cool down if you just made it or heat it back up slowly.
 |
| I love science! |
Now this is where the science part comes in and my nerd comes out. The coagulant you need for the next step is called Nigari. It's actually magnesium chloride with some magnesium sulfate. (Said with a nerdy lisp while pretending to fix your glasses, of course. Just do it, you know you want to.) Just for you nerds like me,
here is the Wikipedia link that explains what it is nicely. I got this little bottle for $5.99 at Uwajimaya. It comes in both powder and liquid, but they only had the liquid kind there.
Once the milk is around the 165 temp (it doesn't have to be exact, tofu is more forgiving than cheese), you're gonna add the nigari. Since I can barely read the label on the bottle, I just started adding the stuff in, a half teaspoon at a time, stirring well in between each addition.
 |
| Ricey milk? |
Pretty soon, the curds will start to appear. When it looks like there are a whole bunch of little ricey-looking curds floating around, you can stop adding the nigari. You want to add as little as needed since the nigari is really bitter and you don't want that flavor in your tofu. I think I ended up using about 4 teaspoons. Cover the pot with a lid and leave it for 15 minutes. During this time, you can get your molds ready.
These molds are the ones my parents used when they made tofu many moons ago. They're made of plastic, and made to look like wicker baskets. Very classy. They both have a wooden block that is sized to each one to use as a press. You can really use any container with drainage holes in them, or even a small colander or strainer and use a bowl full of water to set on top as the press. Look around, be creative! Maybe Goodwill has something you can use. I hear they have all kinds of cool stuff...
Anyway, I lined each mold with some damp cheese cloth and set them in the sink to await the curds. We're getting close, people!
 |
| Kinda looks gross, but it's soooo not. |
When you come back after 15 minutes, your pot should look like this, with the curds a little bigger and sinking to the bottom. Now seive off some of that liquid by resting a strainer in the pot and ladling out some of the excess liquid. You can save this liquid, I don't know if there is any nutritional value to it, but I saved a yogurt tub full... who knows what I'll do with it. Anyhoo, now you're ready to ladle those curds into your molds! I had just enough curds to fill my two molds comfortably.

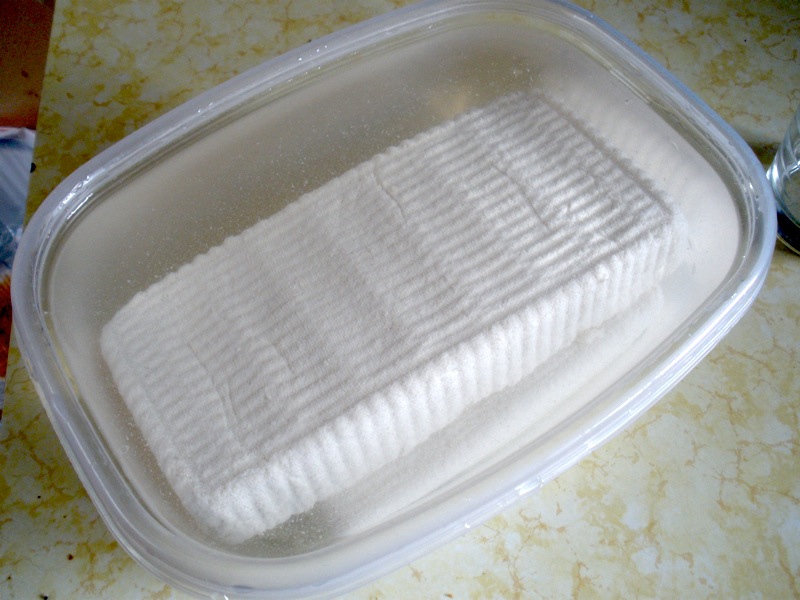
Once the molds are filled to your liking, fold the cheese cloth carefully over them so they are nicely covered. Set your press onto the cheese cloth and place a weight of some kind on top. It really doesn't have to be that heavy, as you can see, a full water bottle was enough. Leave it be for 15-30 minutes. You can check for firmness by poke testing it to see if it's to your liking. This is where the various firmness ratings of tofu come in. Obviously, the less water in it, the firmer it will be. When you're happy with it, carefully drop the tofu into a bowl of water and unwrap it.
 |
| The wicker grooves make it classy. |
Ta daaaaa! Tofu! As fresh as it gets! You may want to taste test for any bitterness, which can easily be washed out by letting it rest in a water bath that is changed a couple times. You can store this tofu in the 'fridge for several days, but you want to eat it ASAP. It has no preservatives, so it will go bad quickly.
So how to eat it? We ate it fresh. We just cut it up into cubes, grated some fresh ginger, and chopped up some scallions. Put these three things together with some soy sauce and bonito fish flakes and we were in heaven...
 |
| Sooooo gooooood... |
In conclusion, tofu is fun and easy to make. It's like a science experiment in the kitchen with tasty results. If I had time, I would never buy it again and just make it whenever I wanted it. We'll see if that happens...


No comments:
Post a Comment