Sunday, June 26, 2011

Sunday Harvest

Alrighty folks, I'm going to challenge myself.  Every Sunday, until the end of the growing season, I'm going to see if I can write a post about my harvests for the past week.  Things are really starting to look good in my garden, and I hope to use this as a garden journal of sorts, that I can refer back to next year.

Here we go.

Picked lots of peas today.  They were flowering last week and I had it in the back of my mind that they would be ready soon.  I forgot about them until a few days ago when Shawn noticed them with his usual "holy shit!" as we were building the chicken coop.  I have to admit, they grew fast.  So I picked them today.  I definitely snacked as I picked, one in my mouth, 5 in the basket...

The lettuce has been going strong for several weeks now, so a lot of sandwiches are being eaten around here.  I picked a whole head today.  The chickens get some everyday.  They're not complaining.  The babies still don't know about it yet.

Here is the official Sunday Harvest picture for this week:

Green is my favorite color.
In other news, I realized that in my homesteading hundred list (to the right), I wrote that I want to go the whole summer without buying vegetables.  I forgot about this and bought some at the grocery store yesterday.  But that will be my second challenge for the summer.  No more grocery store fresh vegetables.  Fruit doesn't count.  We'll see what happens.  I have no idea if I have enough vegetables planted (both quantity and variety) so I may break down and buy some at some point.  I'm gonna try though.  We'll see how quickly I get sick of peas.  I already know this is going to be hard...

(apparently, I'm in a short sentence kind of mood today.)

Saturday, June 25, 2011

Finished!!!

Phew!  Building a chicken coop is hard work, but it's finally finished!  Yes!  Hip hip hooray! 

The thing I'm most excited about is getting my bathroom back.  The babies have been getting bigger every day and they are pretty much busting out of their now tiny box.  There's poop and wood chip dust everywhere.  Tonight is going to get a little cold but tomorrow is outside with them!  (And major bathroom cleaning time for me.)

So here's the lowdown on the whole coop ordeal.  As I mentioned earlier, we started with a large cabinet that we got at the ReStore for $15.  It was a pretty sweet deal, that meant that I started with an already sturdy structure and the materials to make that would have cost more than the cabinet anyway.  Awesome.  We had a ton of scrap wood sitting around the house from the last time we built a coop last summer so we were pretty good in that department.  We also got a handful of screws and nails, hinges, a roosting pole, and two 2x4's at the ReStore for an additional $7.50.  Good deal.

I wanted to limit the amount of stuff I bought new but I did have to buckle down and buy a few things at the H-Dizzle: a roll of 1/2-inch poultry mesh, 6 hook-and-eye fasteners, two sheets of 11x14 plexiglass, a box of large nails, 6 reinforcement angles, and 4 reinforcement plates.

The original plan was to create a chicken tractor that had the coop elevated over the run, and the whole thing would be moved as one unit.  After losing sleep over the design and the complicated logistics of what that would have required, my brain just couldn't take it anymore and we decided to make something similar to the housing that the older ladies already have: a coop and a removable run.  They can be moved separately, and reattached very easily. 

Once the design was figured out, my dad and I spent one afternoon cutting all of the wood pieces for the run and the nesting box.  He brought his awesome table saw over and the process was quick and easy.  (I'm afraid of the damn thing so I measured, while he cut.) 

I built the nest box in one afternoon and the run took several afternoons with Shawn and I working together (a few arguments here and there, but we made a good team.)  The coop was almost the easiest part, minus cutting the shelf out.  We put in a roosting pole, cut out an extra window and a door for them to have access to the run.  We already had a window where the drawer used to be so we just covered it with plexiglass.  Shawn did all the window work.  The roof and the nesting box was the funnest to build. 

Honestly, a lot of it was figured out as we built, since occasionally problems arose that were not expected.  But overall, I think it turned out great.  The roof still needs some shingles or tar paper (or both) but we're not supposed to get rain for the next week so it's ready to be lived in.  Out of my house, ladies!

I didn't take any pictures of the process, but lots of the final result:

Before... (the hole is for the nesting box)

We had to cut the shelf out.  It was a pain.

And after!
The setup: the run is right next to their aunties' so they can glare at each other.
Inside the coop.
The run.
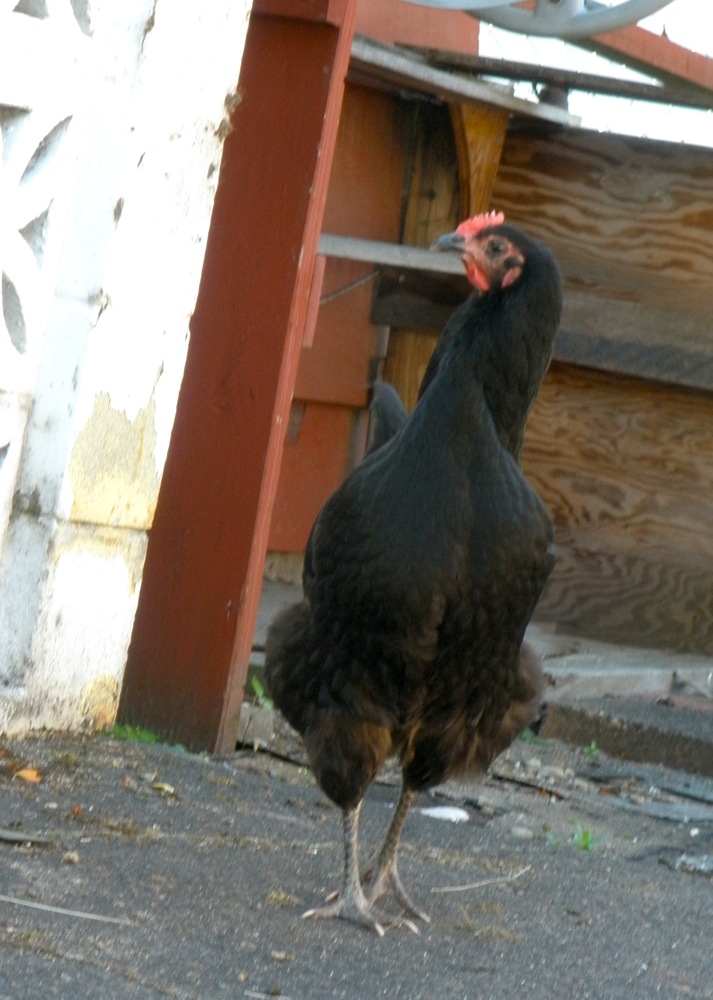
They like it!  They really like it!
Chicken-eye view!
Eventually, the babies will move in with their aunties but that will be another two months before that happens so in the meantime they get to live in this posh unit.  You may be asking: "even though this is just a temporary house, why in tarnation did you go through all the trouble to build something like this!?"  Well, I figured that if I was going to put the effort and materials into making something, might as well be something that could be used again.  I can keep it in case we have to move, or my parents can use it, or I could even sell it to someone starting their own urban flock.  And I just wanted to see if I could make one.  Now I know I can.  And it will be awesome.

Anyway, here's the final cash and supplies count:

* Cabinet from the ReStore: $15
* Used materials from the ReStore: $7.50
* Poultry mesh from the H-Dizzle: $35.00
* Wood pro-bono from my dad, my mom's work, or scrounged from my shed: $0
* Fasteners, angles, other hardware from H-Dizzle: $25.00
* Use of tools pro-bono from my dad's collection: $0
* Shingles/Tar paper pro-bono from a friend: $0

TOTAL: $83.50

Less than a hundred bucks to build a chicken coop?  Sah-weet!

Thursday, June 16, 2011

Play dates!

Now that the 4-week quarantine period for the babies is through, over the last several days, we've staged play dates between them and their aunties.  We've had some pretty predictable reactions with the older ladies feeling jealous that there are other beings that get our attention, and they've made sure to let the babies know who's boss.  They usually do this by chasing them and pecking at them, to which we've reacted with some pecking back at them.  (Only when they bite the babies particularly hard.) 

Abby and Frannie's reactions when they first met the babies was pretty funny.  We were wondering whether they would know that they were smaller versions of them and not just some other birds in the yard that they don't usually pay attention to.  However, they immediately took notice of the other chickens in their territory by standing up really tall and really still.  They also started making these really low throaty sounds, almost like a growl.  I know it wasn't a growl but it was definitely a sound that they don't normally make and it just made them sound unhappy.

The babies were just oblivious to all this and were happily exploring their surroundings bravely.  Of course, Abby was much more aggressive than Frannie and made sure to chase the babies a few times and give them a few good pecks.  Frannie did some of that, but she usually just stood tall in the background making her unhappy noises while Abby did all the dirty work. 

"Maybe we can be friends..."

"eff this, we're out!"

"grrrr...."
"How can you hate us when we're so cute?"
Today's play date didn't involve too much action between the two parties, the angry noises by the older ladies is pretty much gone, and the babies just love being outside.  Abby did make sure to take some time to bully them.

Their coop is officially underway, and I have sawdust in my hair to prove it.  I've had to change the design a bit, but I think it's going to look good and be practical.  All of the cutting is finished, now I just gotta assemble all the parts.  Pictures to come, I promise.

Today was also the official day to do the annual cleaning out of the chicken run.  The floor of the run is directly on the ground, so the crap gets composted pretty quickly.  I always layer the top of it with the old straw that I clean out of the coop and over time, as the ladies kick and scratch in it, all their poop gets mixed in and taken care of.  But, I still like to clean it out once in a while and give them a nice clean layer of dirt and straw to start with.  The stuff I pulled out went straight into the compost pile, (even though it was mostly composted already,) and the top weedy layer of soil from my garden bed when in, weeds in all, with a little diatomaceous earth mixed in.  To top it all off, I also washed off all the caked-on chicken crap that was on their roosting pole, so the ladies are now fast asleep in a squeaky clean (as clean as a chicken coop can be) home. 

I took advantage of the mostly sunny day to dry two loads of laundry and only used 25 minutes of dryer time.  Feels good to be productive and efficient!

Monday, June 13, 2011

Kasutera Update!!!

Hello all!  I'm feeling refreshed and relaxed after three and a half days at grandma's house.  I was down there for my cousin's wedding, but also got a chance to try my hand at this dubious cake again at the request of my auntie Martha.  (You can read the original blog post about my battle with Kasutera here.)

Ok, so making this cake meant I had to hand write the recipe since my grandma's house doesn't have internet.  (Isn't that refreshing?)  As I was writing it down, I noticed a major error in my conversions from grams to cups when I originally made the cake.  It turns out I was using a whole half cup less flour than reqiured.  FAIL.  I was actually pretty happy to find this out because it offered a fairly simple explanation for why all my cakes have fallen.

With this in mind, Martha and I made the cake.  We didn't use green tea powder and tried to stick to the recipe as closely as possible.  We also had my grandma's KitchenAid mixer on our side to do all the hard work so we could make sure that the eggs were good and fluffy.  Here is the revised list of ingredients:

1.6 cups of flour
8 eggs
1.2 cups of sugar
1/2 cup milk
4 tablespoons honey

As far as the directions go, those are still the same which can be found on the post which I've included a link to above.  Oh, another thing that was different was we used a rectangular cake pan instead of a loaf pan.

With high hopes, we put the cake in the oven.  It was baked for the exact time and we pulled it out.  Within about 20 minutes it fell a little, which made me sad.  HOWEVER, once we cut into it, it was perfect!  There was no doughieness, just fluffy kasutera-ness.  We had finally done it!  I think maybe increasing the flour another quarter cup will really make it more perfect.

And guess what?  I have no picture because we ate most of it in one sitting.  Big surprise, huh?  My uncle brought over a flat of delicious strawberries so some people ate it with those saying it was the best strawberry shortcake they had eaten in their lives, but my mom and I just enjoyed it plain.  It tasted exactly like the good stuff you get in Japan.  Success feels so good!

Since I was gone for four days, coming back meant noticing a huge difference in the babies.  They have way more feathers now and are literally busting out of their box.  Shawn and I are feeling a little panicked about getting this coop of theirs finished, until I realized how cold it still is outside.  Even if we did get their house finished in the next few days, they'll just freeze in it at night.  So the rushed feeling of getting the coop built has just been replaced with an anxious feeling in hopes that summer will be here soon...

Speaking of summer, here are the ladies sunbathing last summer.  Notice they're still pretty young because their faces aren't red yet.

Wednesday, June 8, 2011

Humongous Fungus

Remember the mushroom growing kit I got at greenfest a few weeks back?  Well, last week I got around to starting it.  Inside the box is a bag filled with used coffee grounds and mycelium (the plant part of the fungus).  To get the growing started, you cut out the perforated window on the box, cut a slit in the shape of a plus sign and soak the bag for 24 hours in water.  Then you just place it on the windowsill facing away from the sun and spritz with a little water each day.  The box says "in as little as ten days" you'll have a bunch of oyster mushrooms ready to eat.

 I accidentally cut the bunch off before taking the picture.
What they don't tell you is how fast they grow and sometimes you get them in less than 10 days!  Once they started growing they grew so fast that I swear I could see them grow.  We'd leave the room and several hours later, they would look different.  Shawn's reaction to this every time was "holy shit!"

So last night we had oyster mushroom spaghetti in pink sauce.  I got the recipe at the booth where they were selling the boxes, but as usual, I didn't follow the recipe exactly because I didn't have one of the ingredients and I just don't follow recipes well.

Ingredients:
1 cup chopped onions
1 clove garlic (minced)
Olive oil
1/4 cup tomato paste
3 cups milk
1 tablespoon flour
several handfulls baby spinach
Salt and pepper to taste
Parsley

Set a large pot of salted water to boil your pasta.  First saute the onions until just about carmelized, adding the garlic at the end.  In a blender mix the flour, milk and tomato paste.  Add the caremlized onions and puree.  In the meantime take a pound or so of oyster mushrooms and chop them up.  Saute them in the same pan (without the onions) with 2 tablespoons butter until golden brown.  Throw in the spinach to wilt.  Add the pureed tomato mixture and add salt and pepper to taste.  That's pretty much it, we tossed in the cooked spaghetti and topped the whole thing with a sprinkling of parmesan cheese.


Overall, it was pretty good.  I used a little too much flour (the ingredients list above reflects the change I would make if I were to make it again) so the sauce was a little thick.  I might also add more cheese or butter to it to add more flavor since both Shawn and I agreed that "something was missing."

The box is already starting to grow another batch of mushrooms from the same cut I made in the bag.  Did I mention that we can do as many as 4 cuts total?  We've got a lot more mushrooms headed our way!

Sunday, June 5, 2011

Leaps and bounds

When we got Abby, Frannie and Mabel last summer we were told they were around 3 to 4 weeks old.  Looking at our babies now, and comparing their size, that looks to be about right.  But looks is pretty much where the similarities end.

It's crazy how advanced our little ones are compared to their aunties when we got them last summer.  Almost since day 1, Pearl and Elsa have been using their feet to scratch around in their wood shavings.  They've been dust bathing since week 2 and flapping their wings and escaping their box at the first chance they get.  We've have to upgrade to taller and taller boxes twice now and still, they find a way out.  (We've given up at this point.)

Abby, Frannie and Mabel took several days to try to fly out of their box and they were at least 5 weeks old before they realized what to use their feet for.  Dust bathing came way later once they were outside chickens and it took Frannie several weeks to teach the other two how it was done.  I don't know if this difference is because the older ladies were stuck in a crappy place stuffed into a small bin with dozens of their sisters but the difference is huge.  And I can't take any credit for it because I know I didn't teach these new babies how to do any of this stuff.  Instincts are strong.  I just hope this means that these ladies are healthier and we won't have to deal with illness and sudden death like we did with the first ones.

Here's a video of their most recent new trick.  Elsa is a WAY better flier that Pearl (her wings are considerably longer) and she can maneuver herself pretty good.


They pretty much spend most of their day hanging out on the side of their box, pooping out the side into the bathtub or into their food and water.  Awesome.  Just because they're babies doesn't make their poop any less gross to clean up.
They're quickly losing their fluff.
This weekend we took advantage of the weather and gave another try at outside time.  This time, the babies only freaked out for about 2 minutes until they realized that being outside is the bomb.  Within 10 minutes of being out, several rollie pollies, a grub, a slug, and a whole bunch of dandelion heads had bit the dust and were resting (un)comfortably in their crops.  They were so happy.  (The babies were, that is.)

Fun velociraptor action shot.
The heat lamp is going to be turned off in a couple days since they're getting enough feather coverage to keep warm and their coop is now officially under construction.  (Pictures of that to come soon.)  I think they may be able to go out sooner than their aunties did so now it's pretty much crunch time.

Friday, June 3, 2011

Volunteers come in twos (mostly)

This is officially the year of volunteers in my garden.  I let a lot of things go to seed last year to keep the bees happy into the fall and the result of that is evidence of last year's garden popping up all over.  It's kind of crazy to think about those tiny little seeds, braving the cold long winters in the soil and how springtime just magically wakes them up and tells them it's time to live to their fullest potential...

Ok, well, it's not that crazy.  That's just the way nature works and that's how all other annual plants in this world survive year after year.  But, nonetheless, cool.  AND, these are the best of the best seeds that ended up surviving so all the plants are hardy little buggers.

Superstar!!!
Here is my list of volunteers:

2 Sunflowers
2 cucumbers
2 potatoes
3 lettuces
1 radish

One of the lettuce plants is a super champ.  It came up in the crack of the concrete slabs in our driveway.  I feel sad for it since it chose such an unfortunate spot and I can do nothing since transplanting it will probably result in killing it.  On the other hand, we have a plant that hit the target and came up in the raised bed and is growing like crazy.  We picked a couple leaves and put them in our sandwiches, for the official first mini-harvest of the season.  It was nice.

(A note for those of you who know my hatred of lettuce:  I don't hate it when it's from my garden.)

The potatoes came up where I had potatoes last year, and so did the radish.  The sunflowers came up where I had left a head for the birds in the fall, and those needed to be transplanted since they would have eventually been choked by my 'chokes (hahahaha).  The only ones I don't know the origin of are the cucumbers.  My cukes totally sucked last year and I only got one sad looking fruit.  It's a mystery how those seeds got there, but I'm not complaining.

This whole volunteer business gets me jazzed for saving seeds from our harvests this year for next year so I can avoid buying most of them.

Off to enjoy this beautiful weather now that I'm free of my academic obligations!

P.S.  Isn't this pretty?  I love Irises.  My backyard is just bursting with color right now.

Look at all those stamens!  (But these are petaloid. :))

Wednesday, June 1, 2011

My beef with packaging

In the last year or so, I've developed hate for packaging.  All kinds of it.  It started with grocery bags, which most people around here are on the wagon about, and has moved on to all kinds of other stuff.  I started asking myself, (as I recycled and threw away gobs and gobs of plastic, tape, boxes, tubs, trays, etc,) is all this really necessary? 

We are pretty excessive about our packaging at times.  Why do the cookies have to be individually wrapped, stacked into a tray and then wrapped again?  Why does the cereal have to be in two containers?  Can't you just print all the info on the bag?  Ok, I know why they do it; convenience, marketing, making it look like you get more than you actually do, blah blah blah.  But c'mon.

I just keep thinking about all this "stuff" that this packaging is made out of, (ahem, petroleum products if it's plastic) and how short of a lifespan they have.  We are literally throwing away our precious resources like crude oil (a resource that wars get started over) for a little bit of convenience.  I know some of it is necessary for sanitary reasons, but a lot of it can be avoided.

So, every time I go to the grocery store, I think about what I'm buying, what kinds of packaging are involved, whether that packaging can be recycled, and then thinking about whether I could do without the product or replicate the same thing at home.

One such thing that we've stopped buying all together are boxes of instant oatmeal.  Being a busy man on the go who would rather skip breakfast than prepare something himself, Shawn often looks to individually-wrapped instant oatmeal packages as a quick hot meal.  I get it, they're quick and better for you than a donut.  But man, that packaging...

So I've come up with a solution: I just make them at home.  I bought quick oats in bulk at Central Market and the flavor possibilities have become endless.  Once a week, I'll get 3 or 4 tupperwares, and fill them each with about 1/2 to 2/3 cup of instant oats, and a tablespoon of brown sugar.  That's the base.  From there I add fun combinations of cinnamon, craisins, dried cherries, slivered almonds, raisins, etc.  You could also add fresher stuff the day-of, but all the stuff I add is dried so the container can sit for a while if Shawn doesn't get around to eating it. 

What would YOU put in your oatmeal?
Ok, they take a little more time that just buying the packages, but they are really quick and easy and you can make multiples at a time.  To make them even cooler, these are completely whole, unprocessed foods which are even better for you than the flavored stuff at the store!  I think they're fun, and Shawn says they're yummy.  Win-win, folks.

And here's a fun picture.  We all compete for Shawn's affection, yet he just sleeps through the fight...

Related Posts Plugin for WordPress, Blogger...