Showing posts with label Garden. Show all posts

Friday, October 3, 2014

Garden Stuff and Recap

Is summer already coming to a close? How is this possible? The 2014 harvest season has been pretty good. It probably could have been better had I spent more time watering, fertilizing, weeding, and just giving it general TLC, but I'm happy with it.

A harvest from earlier this summer.
A few things to note:
1) My cherry and grape tomatoes have been cray-cray awesome. And super delicious. We're lucky to get half of them in the house.
2) My zucchini plant never got bigger than the size of a basketball. WTF? Forget about even getting any zucchini this year.
3) I let an onion from last season go to flower to see if I could save the seeds. It totally worked. See below.

Dried up onion flower.
Not a ton, but a good amount for next year. Note Eddy eating grass in the background.
4) For some awesome reason, my dry Calypso beans (or Gussy beans as I like to call them,) decided to give me a double harvest this year. When I went out to harvest the dry pods a few weeks ago, I noticed that the plants had a BuNcH of green beans on them. Like a second wave. Why would the plants do that? Because of our silly summer weather? I'm not complaining.
5) I have an enormous beet waiting to be pulled from the ground. I can't wait to have a chance to roast and eat the shit out of it.

A harvest from this last weekend. Edamame are delicious.
6) I found some tent caterpillar eggs on our plum tree, (which was super sad and didn't give us any fruit again this year) so I cut that off. It feels nice to be able to recognize a pest before it becomes a problem next spring.

See the clump up at the top? So evil!!!
7) We have rats. They ate a bunch of my dry beans, but then the edamame started maturing and they switched to those. I think we may have gotten 25% of the harvest that could have been. The rest went to those fuzzy little asshole vermin. They might need to die. I have to research the most humane way of getting rid of rats. Ugh. I think they also decimated my shiso. Who knew that they liked shiso?

8) We got enough tomatoes for two batches of my delicious marinara. Yum.


Monday, July 7, 2014

Food-Saving Challenge: Lessons Learned

For Earth Day I embarked on a personal challenge to live the next 30 days without wasting any food. I made some rules for myself to make it a little easier, but to also make it clear what my goal was.

In the name of saving food I did some new things that I would not have done before:

* Eat a bag of super stale crackers.
* Eat a super mealy pear (gross)
* Eat the stem of a super old broccolli but give the yellowed bud portions to the chickens

Another thing I did that I thought was pretty genious was to put some old stale cereal on a baking sheet and throw it into a recently-used oven to "freshen up." Just about 10 minutes in a not-very-hot oven will make any stale cereal edible again. Pretty cool, huh?

Things were going pretty well with the challenge until my grandma came into town. Naturally, this threw our usual daily routine out the window and we found ourselves eating dinner away from the house a lot more than usual. This resulted in leftovers in the fridge being forgotten, and extra food collecting faster than we could eat it. Things have been better since, though, and I've just come to the conclusion that not wasting any food is really hard, but a goal that we should all strive for at all times.

In other news, my garden is totes awesome this year. We've finished the first round of spinach and snow peas, and I finally got around to planting the second round of peas yesterday. The ladies are really enjoying the flowering spinach stalks that I throw into their coop each day, along with the failed (bolted) bok choy and carrot tops. Speaking of which, I've been having fun with my carrots this year. My seeds were from two seasons ago so I didn't know how viable they were. So, since I felt I had nothing to lose, I just dumped them into the soil, thinking the germination rate would be lower. It wasn't. I have a carrot forest now, that I've been thinning slowly over the last few weeks. It's better than if I had thinned when they were seedlings because now I'm getting a bunch of little carrots to eat, plus plenty of greens for the ladies. I've always struggled with the idea of killing baby plants, and now I don't have to do that anymore. :)

Oh, and I HATE aphids. Jerks.

I know this was kind of a sad excuse for a post. Better ones to come shortly. Thanks for your patience.


Tuesday, April 15, 2014

Hoopin' it Up

The greenhouse that I salvaged last year finally died. So we were faced with the decision to buy something that's going to die again or go for a different system. We went for the new system.

Turns out this new system is way cheaper and will probably last a lot longer.

So grandma Kathy was called to babysit and garden season 2014 commenced. (Better late than never, huh?)

I've always wanted to build a hoop house since it is like a greenhouse for plants that are already in the ground. This gives plants like tomatoes and peppers a chance in our cooler, shorter summers. Also, early in the season, it can be used as a greenhouse for starting seeds.

Here was our supply list:
*10ft 1/2 inch pvc piping (x4)
*PVC clamps (x8)
*Screws (x8)
*Garden cloth (10ft x 12ft)
*Random bits of long wood (two 8 ft poles-worth. 2x2's or crown molding works great.)
*A few bricks (or other heavy items to keep the sides down)
*Some clothes pins or other pinchy things to close the ends
*Staple gun
*Screw driver

I think we spent about $25-$30 on the supplies to cover a 4ft by 8ft area of one of our garden boxes.

The building part was a cinch. First we stuck the two ends of each PVC pipe into the edges of the garden box and secured them to the sides with the clamps and screws. Then I scrounged my wood pile and found some old pieces of trellis and wrapped the edges if the garden cloth around them and stapled them down. This makes it easier for one person to cover the hoop house on a windy day because they act as a bit of a weight and pulls the whole cloth over at once. I also put a few bricks down on top of the wood to really secure it. Then I gathered the cloth at each end and closed them up with some clothes pins. We chose to go with the cloth over clear plastic because plastic is gross and the cloth also breathes just a little bit, which results in not as much heat being trapped in. This also prevents overheating when we forget to open it up on a hot summer day, which I have been known to do.

Open...
and closed.
Keeping the seeds (and Gus) warm.
I plan on putting my peppers, eggplant, and tomato plants in here. (Once I get my hands on some starts...)

Oh, and we finally were able to harvest some chicken shit compost. My dad and Shawn did some heavy digging in the compost pile and harvested about two garbage can fulls of super compost which was filled with worms (which the chickens enjoyed immensely. Sorry worms.) A nice layer of it was turned into the soil, so I have high hopes for our harvest this year.
 
I've also seeded for kale, bok choy, peas, cilantro, and potatoes, all under a another sheet of the garden cloth. It works great to keep the soil just warm enough to speed up germination. I still have a lot more to plant. Even though I'm home all day, it's really hard to find the time to go out and work in the garden without a babysitter because it turns out babies don't really like to be put down, and wearing a baby on the front makes bending down to plant stuff really difficult.

Hopefully I haven't started all this too late in the season.

Finally, here's Eddy enjoying the fresh air while we were working. Seriously. Adorbs. Totes cray-cray adorbs.

Friday, June 21, 2013

What's Eating My Plants?

Something is eating my plants.

I know that the chickens are responsible for the few sad lettuce and kale plants. (Elsa found them the other day and has now made it her mission to get a bite every chance she gets.) 

But something else is eating a bunch of the other stuff. I have been meticulous in picking off the eggs of the cabbage butterflies so my kale (other than what Elsa has gotten) is doing great. The ones that are suffering are my pepper and eggplant plants, the soybeans, the dry beans, and the strawberries. Even the potato plants are showing signs of herbivory.

It's not just isolated to my veggie garden either. My little baby kinnikinnick has been preyed upon as well.  All of the fresh new leaves were devoured by a mystery creature in one evening.

So I'm angry.  I've checked for aphids and I really don't see many. There are a few here and there and they don't really eat the leaves anyway.  I've also been checking for slugs but can't find any either. But that doesn't mean they aren't around.

I think we have a various array of pests at work here.  My soybeans look like the slugs are getting to them.  Maybe the same goes for my already struggling bok choy (below). 

The strawberries are another story.  Though I know the slugs love strawberries, the evidence is of something bigger.  The little green strawberries are being stolen off the vine as a whole.  It looks as though something has come along and cut them off.  So my thought is rats.  We've seen them around the chicken coop so I wouldn't be surprised if they were getting into other stuff too.

Unfortunately, the herbivores aren't the only problem in my garden.  Some stuff is just not growing.  The onions are totally stunted and aren't doing anything.  ALL of my broccoli died, so I had to replant it two weeks ago.  My cucumbers suck, and the eggplant isn't doing anything either.  Even the zucchini is struggling.  What's going on?  Zucchini is supposed to be a like a weed.  I didn't add much to the soil this year, and I think I'm paying the price.  I have been fertilizing, but it doesn't seem to be enough.  Blerg.

Missing: Three green strawberries.
But, there are some things that are happy.  The potatoes are gorgeous, the peas are producing like the zombies are coming, and we have an artichoke!  So I guess not all is lost.  And look at the beautiful garlic scapes!  I think I'm going to be cutting them and eating them this year.  Yum!  Now if I could just figure out what's eating my plants.

Saturday, May 4, 2013

Native Loveliness

I had last Friday off.  Working 56 hours in 4 days gets you that.  It was kind of a nice day.  Despite the fact that I was physically exhausted from the four days prior, I had to get out of the house and enjoy some sun.

While I was messing around in my backyard doing this and that, I had an epiphany.  I had been wanting to create a native plant garden somewhere in my backyard ever since we moved in.  I love native plants and have been collecting them and keeping them in pots for the last several years, which is not really good for them.  I had a place for this garden mapped out for a while, but was feeling a bit underwhelmed by the location and overwhelmed by the work it would take to prep it.  Then I found the perfect spot.  It got a tiny bit of sun but was mostly shady (perfect for native woodland plants), was not being used for anything else, was on a side of the house that needed some love, and was relatively bare of stuff to make prepping the bed easier.  I jumped at Shawn for his approval as soon as he came home from work, and 3 hours later, we had a native plant garden that we were super proud of.

Before...

After!!! From left: red and evergreen huckleberry, wood sorrel, and deer fern, sandwiched by bunches of vanilla leaf. The mulch is stuff we found on Craigslist for free.  It's arborist's mulch, made mostly of Douglas fir.  It smells really nice.

Vanilla leaf!  It smells so good. We had a huge patch of it that we split into 4 sections.

Red huckleberry, a little sunburnt, but it should get better in its new shady spot.
The only problem we had was the wrist-thick holly roots that we had to battle and dig up while prepping the bed.  (That's a whole other project: English Holly murder.)  But it really was an easy project and super fun and super rewarding to finally get those poor plants in the ground.  It is directly underneath the bird house Shawn built so this little corner of our property is prepped to be a little native natural haven.  

Wednesday, May 1, 2013

Garden Learning 2013

Every year, I take on several garden experiments.  Of course, I do the usual stuff since I like to have lots to eat, but the scientist inside me just can't help experimenting and trying new things out.  This way I can really maximize my yields by finding out what grows the best in the micro climate of my backyard.  I couple my experiments with some help from ye olde Google and whisk the summer away, playing in the dirt and expanding my mind.

Lifelong learning, baby.  Never gonna stop.

Last year, the experiments resulted on some successes and some failures.  Pumpuchini (aka saving seeds from a sugar pumpkin)- fail, Beets - mediocre, Peas in fall - mediocre, bok choy - awesome, etc.

(And just to clarify, my experiments include just trying out a new variety of plant, saving seeds from something I haven't saved seeds from before, or just trying a new way of growing something.)

This year I am trying a few new varieties of vegetables:
* Sweet pepper
* Eggplant
* Dry beans
* Fava beans

The pepper and eggplant seeds (as well as all my seeds for that matter) I got from a local seed company up in Bellingham and they are accustomed to growing in our cooler, shorter summers.  They produce smaller fruit, but I'm really excited to see if they work.  (So far, they have been slow to germinate and the ones that have, haven't done much.)


I decided on dry beans because I want to extend my eating of what I grow to past the summer and early fall.  I hardly buy vegetables during the summer which is great, but I want to really buckle down on preserving and canning so that I can enjoy my harvests all year round.  Dry beans will help me do that.  And who doesn't like a nice steamy pot of chili in the winter?  Imagine how much more delicious it would be if it was made with beans and tomatoes from the garden?  Mmmm, can't wait.

I got the fava beans because it is a plant you plant in the fall and harvest in the spring and early summer.  This is a great way to utilize my otherwise fallow planting space while also getting some nutrients back into the soil.  (Beans do that, you know.)  I need to do more growing in the fall and winter.

*I was going to try my hand at asparagus since asparagus is super delicious, but the root bundles (or crowns) that you have to buy and plant are expensive and you really need a ton of space to get a handful.  NOT worth my time or limited space.  Maybe later.

But the experiment I'm most looking forward to is my garlic bulbils.  Last year, I accidentally left my garlic in the ground too long which resulted in the scapes producing large amounts of these little purple balls of garlic at the top of the plant.  I didn't know what they were at the time, but it turns out they are garlic bulbils.  They can be planted in the spring to start new garlic plants. However, it turns out they won't produce garlic the first year.  I'll have to harvest them along with the other garlic, then let them dry until the fall and replant them.  I've read that a majority of them will then produce cloves the second year, with a handful still staying in bulb form.  These are pretty much guaranteed to produce big cloves the third year.  Pretty cool, huh?  I'm excited.  I'm still using my garlic harvest from last year, so if I can keep it up, I'll never have to buy garlic ever again!  I may even start to have extra so that I can share my bounty with family.  Garlic is great because it takes little fertilizing and little space for lots of harvest.

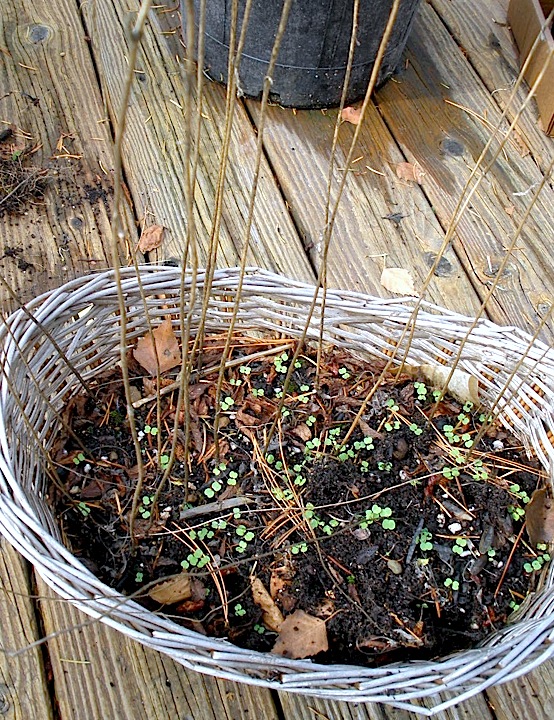
Don't mind the peas mixed in.  Can you spot the hazelnut? (I have no idea where it came from.)
The tall ones are garlic cloves planted in the fall, the smaller ones are the bulbils planted in the spring.

Thursday, April 11, 2013

Mycorrhizae (My-core-rye-zay)

The other day I was turning a bit of the soil in my garden boxes and noticed a large amount of fungal growth or mycelium just beneath the surface.  There was so much in fact, that I had to take pictures of it.  It looked really cool and some of it was white, while some of it had a bit of an orange tinge.

See the hyphae? So stringy...


I immediately ID'd it as a fungal growth, but unlike mold which is totally gross, this was really pretty and didn't smell at all.  I really hoped that it was mycorhhizal fungi, so I did some research.  Though I'm still not a hundred percent on what it is exactly, I'm hoping that that's what it is.  Either way, I welcome it with open arms into my garden soil.

All natural soils have billions of fungal cells, sometimes making up 50-80% of the biomass of soil.  Whoa. They are there to decompose the organic matter and release the nutrients that are trapped in the organic stuff back into the soil for use by plants.  Mycorrizal fungi in particular create symbiotic relationships with plant roots, onto which they attach themselves, and provide the plant with a high water and nutrient absorption rate since it basically increases the plant's root mass.  In return, the plant provides the fungi with carbohydrates since fungi don't have photosynthetic powers.  (This is just the quick and simple explanation.)

Pretty cool huh?  It's believed that as much as 95% of plants have some sort of mycorrhizal relationship so these little guys are super important. 

Ah, nature.  You're so wonderful.


Thursday, April 4, 2013

Upcycling success

Two years ago, we purchased a mini greenhouse.  It was a great buy.  Without it, the cucumbers last year wouldn't have happened and all the seeds wouldn't have gotten the good start that they get every year.  The only problem with this little greenhouse is that the cover was made out of plastic.  And what happens to plastic after it sits in the elements 24/7 for over two years?

It breaks down.  Falls apart.  Goes to shit.  Plastic is really dumb that way.

Sad holey plastic.  Not to be confused with holy blessed plastic, which doesn't exist.
Which is really annoying.  The front panel and the top part had fallen apart so badly that it was like nothing was there.

This left us with three options - 1. Buy a new cover.  2. Buy a whole new greenhouse. Or 3. Somehow make a new cover.

#3 was, in my opinion, the only reasonable and sustainable option that I would even consider.  Duh, I'm the queen of reusing and I hate plastic with a burning passion.  Besides, a new cover would just fall apart in a couple years and buying new stuff is just not in my nature when another option is even remotely possible.  Any reason not to buy plastic is a good one in my book.

So the first thing that needed to be done was to salvage as much of the old cover as possible.  I removed the front and top by cutting out the panels and leaving the reinforcement ribbon and figured the rest was in good enough shape to last another year.  This kept the shape of the cover while leaving an edge for me to sew the new panels onto.  I also took out the zippers from the front panel to use again.  Next, I dug up an old shower curtain from the old place and cut out two pieces to fit the two panels I had removed.  Then my sewing machine and I had a little weekend afternoon date.

Presto, new greenhouse cover.

It probably doesn't let in as much light as the last one did, but it lets in enough, and the heat is really what is nice about a greenhouse.  My seeds that I started last month are resting comfortably in there and probably really enjoyed the crazy summer weekend that we had.


Hooray for upcycling!

Down with plastic!

High-five!


Saturday, March 30, 2013

Stretching and Yawning

Have you been outside???  It's lovely.  Really lovely.  This is the weather that Seattleites like to hide from out-of-towners to prevent too many people from moving here.  You know, that's why it rarely happens.
 

Anyway, I've noticed that every year, I write a "spring is here" post as if it's a surprise that nature is cyclical and that winter has an end.  But when the winter is long and dark and boring like it is around here, I guess it does seem like it's never-ending by the time February rolls around.

Why skip it this year?

So without further ado...


Spring is here!  The daffodils I planted are up and shining bright, and the tulips are beginning to open.  I've been hearing a red-winged blackbird on my runs and all the dead-looking plants are budding and little green leaves are poking their tiny heads out.

I've been planting seeds like crazy, the greenhouse is almost full, and we've even done some landscaping.  Our brains are full of plans to further beautify our yard and the season of full weekends and dirty fingernails is in full effect! 

It feels pretty damn good I must say.

I used to do this regularly as a child.  This is what I got from 2 shovel-fulls of dirt.

Monday, October 29, 2012

The Fall Garden

Everyone thinks of summer and spring as the best times to be in the garden.  Though I wholeheartedly agree, (warm weather, sunshine,) the garden in the fall is quite lovely as well.  You just have to go outside and look closer.

Volunteer arugula seeds germinating.

Cool stink bug I found on a board in the dark corner of the shed.

Blueberry plant ready to hibernate.

More peas! (From the seeds I planted in July.)

The kale is coming back!

Sunday, September 16, 2012

Slappin' it together.

I think building a legit chicken coop has made us pretty confident in the power of a hammer and nail.  'Cause when we realized we needed a compost bin, we slapped one together like it was easy as pie. 

In the old place, we had a corner of our yard that had a concrete wall that was perfect for a compost pile.  It was pretty big, and made it really easy to just toss whatever we needed composted into the corner.  It was accessible to the ladies to turn it while looking for worms, which made it a pretty good system.

Unfortunately, the new place has no such corner.  So we had to build a compost bin.  We though about buying one, but they're pretty expensive.

We started with a piece of grape stake fencing that we originally picked up as possible material to build the coop.  It was pretty old and rotten on the edges, so we cut off the ends of the vertical slats down to the 2x4 cross pieces.  This got rid of the rotten parts while maintaining stability.

Brackets, random pieces of plywood, nails, screws...
Then we cut the whole thing into 3 pieces to make the back and 2 sides of the box.  Those were secured together with random brackets and things we had lying around.

We really just slapped it together.  It's pretty rickety.  I wouldn't trust the stability even for a doghouse.
At this point we decided to move it to it's permanent home since it was still light enough to move.  But in order to do that, we needed to do some concrete work.  I had never laid any concrete, but Shawn had, and my dad is quite the home concrete-laying veteran, so we were able to pour a slab down in no time.  We decided a concrete slab was necessary since on the other side of the fence is a veritable wall of blackberry bushes that I wanted to prevent from growing into my compost. 

And what happened right after we poured it?  The cats walked in it of course!!!
Once the stab was dry and set 2 days later, we moved the incomplete bin to it's final destination.  I was a little sad to say goodbye to the cute little kitty footprints.

Next we tacked on a piece of plywood 10 inches from the bottom to create the front wall.  A second piece of plywood was cut to (semi) fit the bottom part.  This way, instead of digging down to the finished compost next year, we would have a door for instant access to the black gold when we need it.  The door is made so that it can be slid in and out (up and down).  This was done by tacking on two small pieces of wood into each corner to hold the board in place.  The current board we're using isn't quite the right size, and we do have some plywood that we can cut to fit, but we'll get to fixing that when we get around to it.  The key was getting this whole thing made quickly so we could actually put stuff in it, since chickens keep pooping whether you have a compost bin or not.

This was a few weeks ago.  It's way fuller now.
The last part of construction was to attach a roof to the top with some hinges so we can easily open it up and drop stuff inside.  The plywood we used for the roof is pretty thin so it's really easy to open it with your elbow when you have a handfull of stuff you need to throw in. 

So there you go.  Who knows how long the actual bin will last, but for now we have a place to put all the chicken crap, garden garbage, and food scraps.  We've been watering it down every few weeks to maintain moisture and promote decomposition, and we'll probably turn it here soon to see how things are looking towards the bottom.  I'm happy to say that all the materials that went into the construction of this bin was stuff we had lying around so basically we got a compost bin for free, plus some elbow grease.  Oh wait, we did have to buy the concrete.  So we got a compost bin for $15 plus some elbow grease.  Still a good deal.

Tuesday, August 21, 2012

Pruning Raspberry Plants

Raspberry season is over.  So sad.  Unfortunately, what could have been an amazing raspberry season for us this year was interrupted and cut short because of the move.  We moved the plants during the most crucial stage, as the berries were ripening, so the berries themselves did not ripen fully and some of them were dry, small, and just plain sad.  The plants took awhile to establish, and a lot of it died off.  But, in the last several weeks, we've had a resurgence of the plants and have more growth.  No more berries, but now that the plants themselves have established, next year looks promising.

Every year, in order to maximize berry production and to give the live plant parts enough room, you have to prune the bushes.  It's really easy.  Here's what we started with:

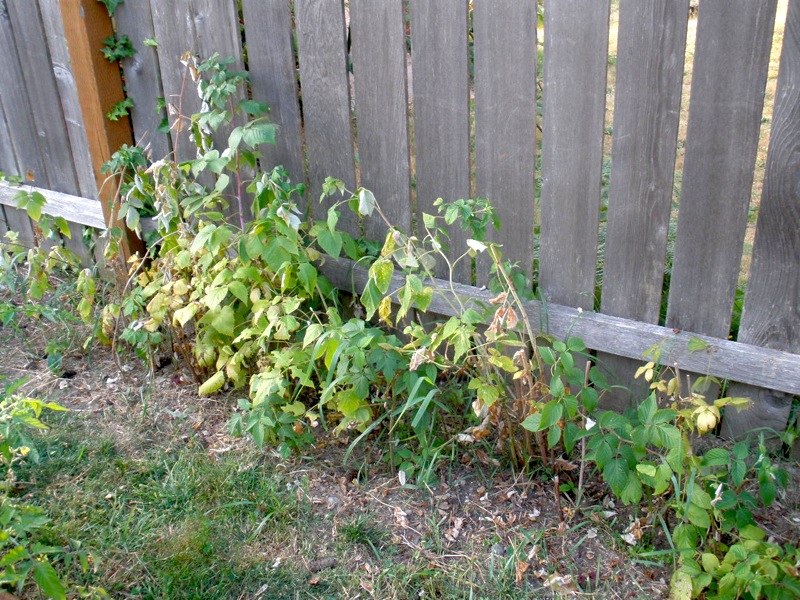
Lots of dead stuff with green parts underneath.  Since raspberry bushes are not really bushes, and just a whole bunch of individual-looking sticks coming from the general same ground area, pruning is easy.  You just find your dead sticks, follow them down to about 12 inches from the ground and cut.  I think you can cut lower, but that's what I did this year.  You just need to make sure that the sticks you cut are the ones that fruited this year.  The ones that didn't fruit will next year so leave them alone.

That's it.  It took 3 minutes and looks way better.  See?


Saturday, August 11, 2012

Pruning Tomatoes

Early in the spring, I decided that this would be the year of the tomato for me.  I've become more and more aware of the unhealthiness of canned tomatoes, (due to the BPA that gets leached into the tomatoes from the can,) so I really want to can my own that I can use year-round.

So I have 15 tomato plants in the garden.  And most of them are from the seeds I saved from last year.  Their sheer number is one of the main reasons it looks like a jungle in my backyard since they're growing so well and look so bushy.  But now that they all have little green guys on it and have a ton of flowers, their bushiness can be a detractor to tomato production.  I just recently learned that you can prune tomato plants to help with production.  The basic idea behind it is that if you take off some of the lower branches that have no flowers or fruit, the plant will send more of the sugars and energy that it creates through photosynthesis to the fruit instead of to useless branches and leaves.

Obviously you need most of the leaves to actually photosynthesize, but the hardiness of a tomato plant can handle some pruning.  I did do some research on how to prune plants but got a little overwhelmed with some of the websites I came across so decided to just use my own personal horticultural knowledge of understanding of how plants work and did it myself.

Basically, I just made sure to cut off branches that were down low or in the middle of the plant that got less sunlight than the rest of the plant.  I also made sure none of the branches I cut had any flowers or fruit.  I think I cut off 5-6 branches on each plant.  I probably could have cut off more, but decided to take it easy.  Hopefully this helps production.  Now that I'm thinking about it, I should have left one plant alone and weighed the fruit that came off of it and compared it to another plant to see the difference.  Maybe next year.  But this year, come on tomatoes!  And come on good weather!  Make my tomatoes red!

The red circles are where you could cut. I think I left the middle one on this particular plant.

The leftovers.

Monday, August 6, 2012

Sunday Harvest 2012!

I know I know, I said I would do this last weekend.  But I need to ease myself into this whole Sunday Harvest thing again.  And, my harvests aren't going to be as good as they were last year, since my garden, though thriving, isn't in the best conditions to give me an interesting and diverse harvest.  But next year... you watch out next year, my garden's gonna kick your ass!!!

But getting back to the point, this is 2 weeks of harvests in one. (Not including some of the stuff that we harvested already and I failed to tell you all about.)

Last week we had a couple zucchini, some green onions, some carrots, the final bok choy (we had so much, we're kind of sick of it,) and a pumpucchini.  That's one of my pumpkin/zucchini hybrids.  I picked it just to see what it was like.  The ones I left on the plant are getting super big.


I also picked a volunteer catnip that has sprung up around my tomatoes.  The following is a montage of what happened after it entered the house:


It was entertaining.  It was gone quickly, Nikolai didn't puke it up, and the kitties were happy.


This week we got a couple handfuls of snow peas, more zucchinis, beets, and carrots.  I wish I had planted more beets.  There's nothing more satisfying than pulling root vegetables.


There.  Sunday Harvest 2012 has started.  Now to just keep up...
Related Posts Plugin for WordPress, Blogger...