We were ready to move as soon as the wedding was over. However, the ladies were not. And they wouldn't be until we built them a new home. I may have mentioned my stress about having to build a new coop (again), but thanks to my husband's major internet research skills we stumbled upon a coop plan that was free, simple, and easy to build. It was exactly what we wanted.
Once we found the plan, I felt like half the job was already done. This is also when I got excited because we're not carpenters, but this was a chance for us to build something legitimate to test out our skills. I pored over the plans for several days, trying to figure out what materials we needed to purchase, including the tweaks that I decided were needed to build the coop to our specific needs.
The plan in its original form, resulted in a 4ft x 4ft coop. I felt like it needed to be a tad larger so we decided to build a 4ft x 5ft coop instead. We also put the nest box closer to the floor and cut the door in a different place. We had some old shelving that my dad saved so we were going to use that for the flooring instead of plywood, and the roof pieces needed to be cut into different pieces than the plan to maximize efficiency in the usage of expensive plywood. But other than that, we stuck to the plan pretty closely, which was pretty good since I have a habit of straying from plans.
Once I figured all that out, to Home Depot we went. Our original purchase of all the lumber plus some corrugated roofing, hooks, and hinges equaled about $230. Luckily we already had the above-mentioned flooring plus a bunch of nails and all the tools from my dad's supply.
Then it was time to measure twice, cut once, and start hammerin'.
First the frame needed to be built...
 |
| The frame: super easy construction. |
Then we decided to move it to its final resting spot in the back of the yard because carrying a heavy coop didn't seem fun. This required a bit of leveling by digging down to lower one side.
The flooring was then nailed down, and then it was time to work on the walls. The plywood was first cut into the correct pieces, then the holes for the door and nesting box was cut. The plywood was then tacked into the frame with a bunch of nails.
 |
| Looking in from the back. |
 |
| Nest boxes. |
Then it was time to work on the roof. I assembled most of it on my own since Shawn and my work schedules were hard to coordinate, so he had cut all the necessary pieces a day earlier to make it easy on me. The plans result in a roof with a skylight so that the ladies will get as much daylight as is available which is a huge improvement from their last coop.
Unfortunately, I made the inside panels of the roof a bit too narrow, so when it came time to attaching it to the structure, we found that it was off by a half an inch. So we had to take it apart to fix it. It was a pain, but it had to be done, and proves that you can never measure something too many times. :)
Once the roof was fixed and attached, we were left with the final touches. Hinges and doors, the roosting pole, the corrugated roofing, hooks, etc.
 |
| Painting is fun! |
We did have to take some emergency Home Depot trips for random extra supplies, so including those, the coop itself cost a total of about $280. Pretty good for a nice coop, we think.
Our next step is to build the run. For now, we have a very sketchy run that we put together using the old run we built for the babies last year and some random boards hammered together. Building a run that is really predator proof is our next big project. Until then, I'll have daily heart attacks as I worry about the ladies being eaten by racoons.
Here are some more pictures of our finished product:
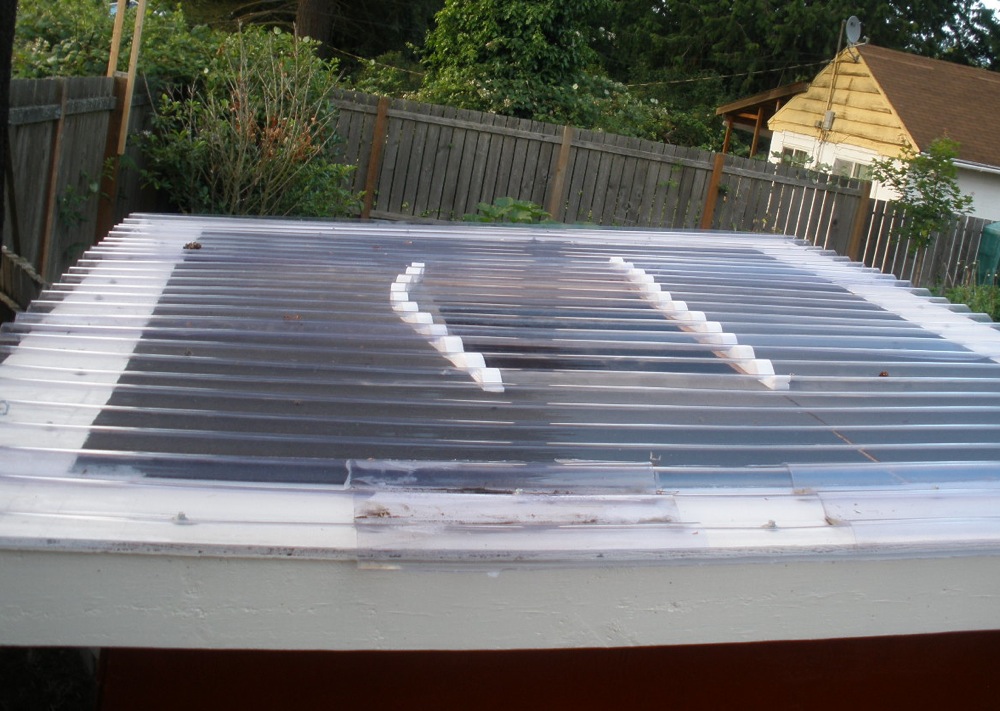 |
| Sky light from the top. |
 |
| Sky light from the inside. |
 |
| Back door closed. |
 |
| Back door open. |
 |
| The setup inside. |
 |
| The set up outside. |
This is amazing! That is one stylin' crib. I think our yard might have room for one of those...
ReplyDelete