Showing posts with label Science. Show all posts

Thursday, April 11, 2013

Mycorrhizae (My-core-rye-zay)

The other day I was turning a bit of the soil in my garden boxes and noticed a large amount of fungal growth or mycelium just beneath the surface.  There was so much in fact, that I had to take pictures of it.  It looked really cool and some of it was white, while some of it had a bit of an orange tinge.

See the hyphae? So stringy...


I immediately ID'd it as a fungal growth, but unlike mold which is totally gross, this was really pretty and didn't smell at all.  I really hoped that it was mycorhhizal fungi, so I did some research.  Though I'm still not a hundred percent on what it is exactly, I'm hoping that that's what it is.  Either way, I welcome it with open arms into my garden soil.

All natural soils have billions of fungal cells, sometimes making up 50-80% of the biomass of soil.  Whoa. They are there to decompose the organic matter and release the nutrients that are trapped in the organic stuff back into the soil for use by plants.  Mycorrizal fungi in particular create symbiotic relationships with plant roots, onto which they attach themselves, and provide the plant with a high water and nutrient absorption rate since it basically increases the plant's root mass.  In return, the plant provides the fungi with carbohydrates since fungi don't have photosynthetic powers.  (This is just the quick and simple explanation.)

Pretty cool huh?  It's believed that as much as 95% of plants have some sort of mycorrhizal relationship so these little guys are super important. 

Ah, nature.  You're so wonderful.


Wednesday, January 11, 2012

Sourdough: Biology in the Kitchen

This year for Christmas, my grandma gave me some sourdough starter that she got in Alaska when she was up there on her cruise.  She didn't wrap it and put it under the tree and instead handed it to me as an afterthought after we opened all our gifts on Christmas morning because she didn't know if I would want it.  Are you kidding me?!  Naturally, I was very excited.

Before I go into what I did, let me talk about sourdough bread.  First of all, it's delicious.  Especially when toasted and smothered in butter and jam.  Having said that, the process of sourdough baking can be a little gross.  It isn't something that you can't just whip up on an afternoon like a regular loaf of bread.  You have to start with a starter.

Starters are usually small batches of old dough from past sourdough recipes that are saved.  Sometimes they're called "seed sour" or "mother dough."  They contain a live culture called Lactobacillus, which lives in a symbiotic relationship with yeast.  Starters are usually best when they are saved from a tried and true sourdough recipe that has been alive (literally) for years.  As the starter is used, more flour and water is added to the starter to let sour again to maintain the live cultures.

Starters can also be created by allowing flour and water to naturally sour.  (Meaning mix them together and leave it on the counter for a while.)  The needed cultures and yeasts are available in the air all the time, but the key is to catch the right bacteria and not the wrong ones.  Starting a culture can be a pain because it is likely that in the beginning there will be an imbalance in good bacteria vs. unwanted bacteria, but eventually it will even out with the good stuff replacing the bad.  Every 12 hours to a day, new flour and water is added to the starter.  A lot of starter is often thrown out as it is replaced by new flour and water, otherwise by the end of it, you could have gallons of starter.  But once a starter is created it can last forever with proper maintenance.  This is a really complicated process that I have not described well enough to do it justice, so I recommend more Googling to get more deets.  Wikipedia helps too.

Back to my starter gift.  I looked at the ingredients and noticed there are a lot more ingredients than are needed.  Hmmm...  I did some research and found out that this isn't "true" starter and more just a tourist trap kind of gift.  Bummer.  Oh well, we'll still give it a shot.

What it looks like after 48 hours.
Inside were instructions on how to start the starter.  It said to add the packet of stuff to a 2 cups of flour and 2 cups of warm water.  After mixed, it needed to sit in an 85 degree location for 24 hours, with periodic mixing.  Once it sat in the 'fridge for 24 hours after that, the starter would be ready.  I was excited.  The starter smelled slightly sour so I had some hope.  I made the bread recipe that the starter packet came with.

How did it taste?  Not sour at all.  Bummer.  But the bread was really delicious.  I made some orange rolls a few days later, which were also super delicious, but also not at all sour.

After new flour/water added.
So now the rest of the starter is sitting in a jar on my counter.  I'm adding some flour and water periodically and am hoping that it can start a real natural souring process.  I've been nursing it for 3 days now and it looks ok, no mold or anything.  It also tastes slightly sour, but not enough to make a good bread.  I'm still going to bake some bread tonight with it and see how it tastes.  I may have to start over with fresh flour and water because I don't know if the extra additives that the starter came with will disrupt that natural process.

So it sucks that the starter wasn't legit.  But if anything, now I'm determined to do it right.  By the end of this, I will have a good starter, I will make sourdough bread, I will smother it in butter and jam, and it will be delicious.  Just you watch.

Sourdough, this isn't over.  You will be mine.

P.S.  Just in case you didn't get enough cuteness the first time, here is another chance.

Blurriness will not get in the way of cuteness.

Wednesday, December 28, 2011

Cleaning Clothes with Science!

About a year ago, I read and reviewed a cool book from New Zealand about a lady who went completely chemical-free in her home.  She handmade all cleaning and personal beauty products and eventually made a living off of it.

Since reading the book, I too have slowly starting phasing out chemical products in my home.  I haven't bought toilet bowl cleaner since then, as well as all-purpose surface cleaner and glass cleaner.  All of these things have been replaced by the very cheap and effective team called baking soda and vinegar.  It's been awesome.  Not only are these things super cheap (I buy baking soda by the pound now, just 2 bucks!) but it feels good knowing that these cheaper options are also much less harmful to the earth as well as all the lovely inhabitants of my home.

Yesterday, I took the next step and made my own laundry detergent.  The recipe I used is a combination of the recipe in the aforementioned book as well as other instructions I've read in earth-friendly blogs:

I used Boraxo, not Borax, I hope it works.
1 cup washing soda
1 cup borax
1/2 cup baking soda
1/2 bar of soap, finely grated  (this comes to about a cup)

Mix 'em all up and use 1/4-1/2 cup per load in a top loading machine.  (The water needs to be warm or hot to melt the soap.)  More efficient side loading machines only have to use 2-3 tablespoons.

I made a small batch this time to make sure I liked it, and next time I'll make a larger batch.  The soap I used was Dr. Bronner's, made of all fair-trade ingredients, and I got the rose-scented one since that's Shawn's favorite smell.  The borax I had left over from our epic ant-war of 2008, and the baking soda... well duh.  The biggest problem was the Washing Soda.

Before I go into the deets of my quest for this elusive product let me tell you a little bit about it.

Washing soda is Sodium Carbonate, or Na2CO3.  (The science nerd part of my brain is totally excited right now.)  It can naturally be extracted from the ashes of plants, but is synthetically produced though a process called the Solvay Process from salt and limestone.  Washing Soda is used in all different kinds of ways, from making glass to developing film, and browning German pretzels to getting all the tissue off of skulls in taxidermy.  (OMG, so cool!)  The reason it works so well in laundry is because it's a natural water softener, by competing with the calcium and magnesium ions in hard water which prevent laundry detergent from working.  By doing all this, it helps get out grease, alcohol, and oil stains.  (My head just exploded with the awesomeness.)  Washing soda to the rescue!  It's a bird, it's a plane, it's WASHING SODA!

This basically explains why I went through all the trouble of getting this stuff.  I had a feeling it wouldn't be easy to find, since I've never seen or heard of it before I read about it in the book.  A little bit of research online resulted in a lot of old discussions on blogs of people asking where they can get it.

I started my quest at Central Market to no avail.  I didn't see it on the shelves, so I got home and called them just in case, but the lady had never heard of it so I knew they didn't have it.  The people at QFC, Fred Meyer in Shoreline, or Safeway had never heard of it either, (they all responded with: "washing.... soda....?") so I felt a little sad that maybe my laundry detergent dreams were never going to be fulfilled.  Then I read online that someone found it at Fred Meyer in Ballard so I called them and the got the response of "oh yeah, we have it.  It's right next to the borax in the laundry detergent aisle."  YES!

So I drove to Ballard and got it.  And I was happy.

I calculated the price of this detergent to see if it was cost efficient compared to just buying it, and came up with the price of this home-made kind to be about 28 cents per load.  Compare that with a similar earth-friendly detergent that is 35 cents a load, and I think I have a reason to keep doing this!

The results?  It's totally awesome.  The clothes were not only clean but they smelled like.... nothing!  All the usual smells that accompany well-worn clothing was gone.  If you're the type to want your clothes to smell all perfumey, then you might want to add some essential oils to the recipe but I like it when my clothes smell like nothing.  To me, that's clean.  And they seemed softer too, but that may just be something I wanted to notice.  Either way, I'm happy with the results and will make a bigger batch next time. 

Added note:  Even if you don't want to go through the trouble of making detergent, adding washing soda to your regular load with regular detergent will make your detergent work better, thus resulting in you having to use less detergent.  So if you find yourself in Ballard, you should pick some up.  Just saying.

Friday, March 18, 2011

Making Tofu: It's Science!

I've had the urge to make tofu for a little while now, and with my spare time in between quarters, I found the opportunity.  Tofu, a delight for many vegetarians, non-vegetarians, and most Asian cultures, is one of my favs.  It's such a simple staple that can go into virtually anything and take the flavor of everything.  It's a really nice blank slate to start with that can be transformed in many dishes.  Some don't care for it, but I think that's like saying you don't like bread.  Tofu itself comes in various forms and textures and you can even get it flavored both sweet and savory.  mmmm...  I love it.

Tofu is in many ways really similar to cheese.  You start with a milk, add a chemical to it to separate it into curds and whey, and then squeeze most of the liquid whey out.  The curds squished together make tofu or cheese.  The biggest difference is that tofu has no live bacteria in it and you eat it right away.  Oh and when making tofu, you also have to make the milk first... from soybeans.

The website that I got the directions from is this one, the same one that gave me the so-far-yet-to-successful Kasutera cake.  Even though you could read it there, I'll explain what I did here anyway.

Ok, so first you start with a pound of dried soybeans.  NOT edamame.  The dried white ones you can get in bulk.  I started with organic, hoping that means they were not involved with Monsanto. (Boooooo!)  I washed them and left them to soak in water overnight.  In the morning, they were nice and soft (not cooked soft, but not rock hard anymore) and back to their original size.  I rinsed them out again.

Then I threw them in a food processor with just enough water to cover them and pureed them.  I would recommend using a blender for this, but our blender sucks balls so I had to use the food processor.  It was kinda messy, and I had to process them in 4 separate batches.  But that was ok, because you have to make the soymilk in two batches, unless you have a giant stockpot.  I mean really giant, like one that could hold 2 gallons of liquid easily.  Who has one of those?

So take half your pureed soybeans (about 4 cups), which now look nice and white and gooey, and put them in the stock pot with about 14 cups of water and set it on medium low heat.  (It helps to have the water already hot when you throw the white goo in, just for time's sake.)  You're going to want to cook this for about 30 minutes, stirring every few minutes, but you can't leave it.  It will foam over.  Several times.  Each time it threatens to do so, you can either take it off the heat each time to let it simmer down, or add a half cup of cold water by sprinkling it over the foam.  I did both. 

Watch out! Here it comes!
Here it is, threatening to boil over.  It's ok, the foam will go away eventually, I promise.  Here's proof:

See?
After it has cooked for about 30 minutes, the foam will go away, and you'll be left with soy milk that's ready to be separated from the soy pulp.  I lined a colander with cheese cloth and placed that over a large bowl to catch the milk.  I repeated this whole process again with the other half of the soybean puree and was left with about a gallon of fresh soymilk. 


 The pulp that you're left with is called okara and can be used for cooking.  I'm sure my next blog will be something about a cool thing that I did with it.  It's not good to eat on it's own, though the chickens love it.  (Don't worry, Mabel got to try some before she died.)

250 degree oven for 30 minutes, stirring every 5 minutes.
I dried half of the okara in a low temp oven and threw it in the freezer, because I knew I wouldn't be able to use it all before it went bad. 

Milky...
Back to the milk.  You can save some to drink if you like soy milk, but I don't, so we're moving right along.  The milk went right back into the rinsed stockpot and back onto the stove.  (Now there technically was an intermission of a night here since I took two days to make this, but we'll pretend this all happened in one day, k?)  For the next step, you want the milk to be 165 degrees.  This may mean you need to wait for it to cool down if you just made it or heat it back up slowly.

I love science!
Now this is where the science part comes in and my nerd comes out.  The coagulant you need for the next step is called Nigari.  It's actually magnesium chloride with some magnesium sulfate.  (Said with a nerdy lisp while pretending to fix your glasses, of course.  Just do it, you know you want to.)  Just for you nerds like me, here is the Wikipedia link that explains what it is nicely.  I got this little bottle for $5.99 at Uwajimaya.  It comes in both powder and liquid, but they only had the liquid kind there.

Once the milk is around the 165 temp (it doesn't have to be exact, tofu is more forgiving than cheese), you're gonna add the nigari.  Since I can barely read the label on the bottle, I just started adding the stuff in, a half teaspoon at a time, stirring well in between each addition.

Ricey milk?
Pretty soon, the curds will start to appear.  When it looks like there are a whole bunch of little ricey-looking curds floating around, you can stop adding the nigari.  You want to add as little as needed since the nigari is really bitter and you don't want that flavor in your tofu.  I think I ended up using about 4 teaspoons.  Cover the pot with a lid and leave it for 15 minutes.  During this time, you can get your molds ready. 

These molds are the ones my parents used when they made tofu many moons ago.  They're made of plastic, and made to look like wicker baskets.  Very classy.  They both have a wooden block that is sized to each one to use as a press.  You can really use any container with drainage holes in them, or even a small colander or strainer and use a bowl full of water to set on top as the press.  Look around, be creative!  Maybe Goodwill has something you can use.  I hear they have all kinds of cool stuff...

Anyway, I lined each mold with some damp cheese cloth and set them in the sink to await the curds.  We're getting close, people!

Kinda looks gross, but it's soooo not.
When you come back after 15 minutes, your pot should look like this, with the curds a little bigger and sinking to the bottom.  Now seive off some of that liquid by resting a strainer in the pot and ladling out some of the excess liquid.  You can save this liquid, I don't know if there is any nutritional value to it, but I saved a yogurt tub full... who knows what I'll do with it.  Anyhoo, now you're ready to ladle those curds into your molds!  I had just enough curds to fill my two molds comfortably. 

Once the molds are filled to your liking, fold the cheese cloth carefully over them so they are nicely covered.  Set your press onto the cheese cloth and place a weight of some kind on top.  It really doesn't have to be that heavy, as you can see, a full water bottle was enough.  Leave it be for 15-30 minutes.  You can check for firmness by poke testing it to see if it's to your liking.  This is where the various firmness ratings of tofu come in.  Obviously, the less water in it, the firmer it will be.  When you're happy with it, carefully drop the tofu into a bowl of water and unwrap it.

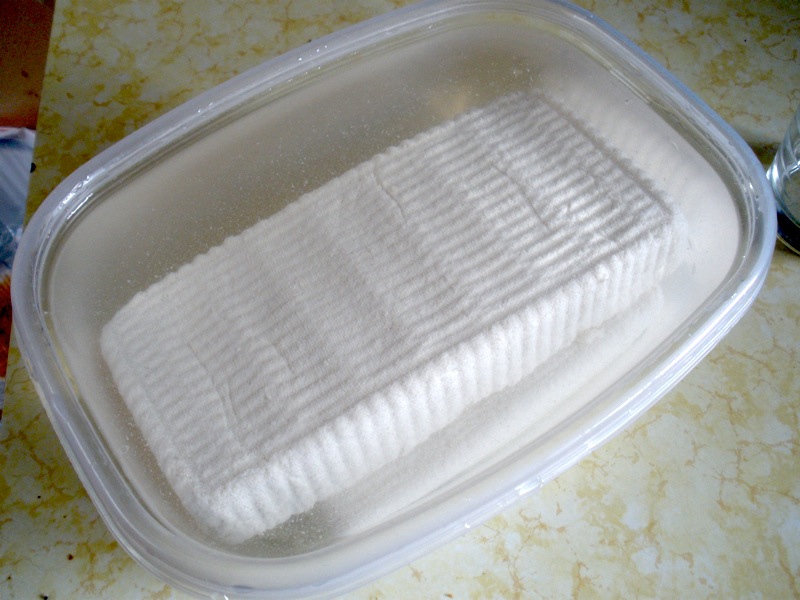
The wicker grooves make it classy.
Ta daaaaa!  Tofu!  As fresh as it gets!  You may want to taste test for any bitterness, which can easily be washed out by letting it rest in a water bath that is changed a couple times.  You can store this tofu in the 'fridge for several days, but you want to eat it ASAP.  It has no preservatives, so it will go bad quickly.

So how to eat it?  We ate it fresh.  We just cut it up into cubes, grated some fresh ginger, and chopped up some scallions.  Put these three things together with some soy sauce and bonito fish flakes and we were in heaven...

Sooooo gooooood...
In conclusion, tofu is fun and easy to make.  It's like a science experiment in the kitchen with tasty results.  If I had time, I would never buy it again and just make it whenever I wanted it.  We'll see if that happens...

Thursday, January 27, 2011

Gingery Goodness

I was bored this weekend (well, bored from homework...) so I decided to make ginger beer.  For those of you of said to yourselves, "is that the same thing as ginger ale?", no, it's not.  It's BETTER.  (Although some use the terms interchangeably, I think there's a distinction.)  Ginger beer actually tastes like ginger, and has the spicy bite that all ginger flavored things should have.  Now, I realize that I am a little biased when it comes to ginger because I love it so much.  Whenever I make myself ginger tea, I put so much ginger in it, it burns.  I even put cayenne pepper in it if I'm in the mood for two kinds of burn.  mmmm...

Ok, back to ginger beer.  I started to search for an easy make it yourself recipe and I came across a familiar site.  This one!  Yep, it's Dr. Fankhauser, my cheese friend!  I love this guy.  I bet he's really cool, like Clancy.  He explains things so well and makes the most complicated tasks seem easy.  Once I found this website, I was finished searching so I started gratin' my ginger.

I put a gallon of water and a cup and a half of white sugar to boil in my stainless steel pot I bought at Goodwill for 10 bucks.  I think I ended up using about 1/2 cup of grated ginger... I think.  I started with a piece of ginger the size of maybe my palm, but kept adding more and tasting it until I felt there was enough bite.  I also added a couple tablespoons of lemon juice and let it get to a boil.  Then I turned the burner off and let it cool for a couple hours.  Once it cooled down to the point where it was just pleasantly warm, I added 1/2 tsp. of regular baker's yeast that had proofed in a bit of warm water for 10 minutes.  Then I poured the whole mixture into a gallon jug that I found at Goodwill for a buck.  I put some cheese cloth over the opening to catch all the pulp.  Make sure to squeeze out all the juice form the pulp because that's where a lot of the flavor is.  Then I just placed the cap on the jug to make sure nothing got in.  (Don't screw it down, there needs to be room for gas to escape.)  At this point I let it sit overnight at room temp so that the yeast could do its job. 

The next morning, there were bubbles on the walls of the jug (tell-tale signs of happy yeasties feasting on sugar,) and it was ready to bottle.  There was some stuff that had settled on the bottom so I mixed it up a bit.  As for the bottles, I just reused cleaned water bottles that I got from a certain friend who cannot seem to break the habit of buying bottled water.  (Thanks for the bottles! :D)   I filled them up to about an inch from the top, squeezed the air out so the liquid came up to the tip top and screwed the lids on.  I ended up with eight 16oz water bottles filled. 

Then it was waiting time again.  They sat on my dining table for the rest of the day, and spent the hours being harassed by me as I squeeze-checked them every time I walked by.  After several hours, the yeast was clearly working because the air I had initially kept out was replaced and the bottles were feeling pretty bloated.  I opened them several times throughout the day to release the pressure so they wouldn't explode.  I don't think I was supposed to do that, but the bottles weren't that sturdy and I didn't feel like dealing with sugary ginger explosions in my kitchen.

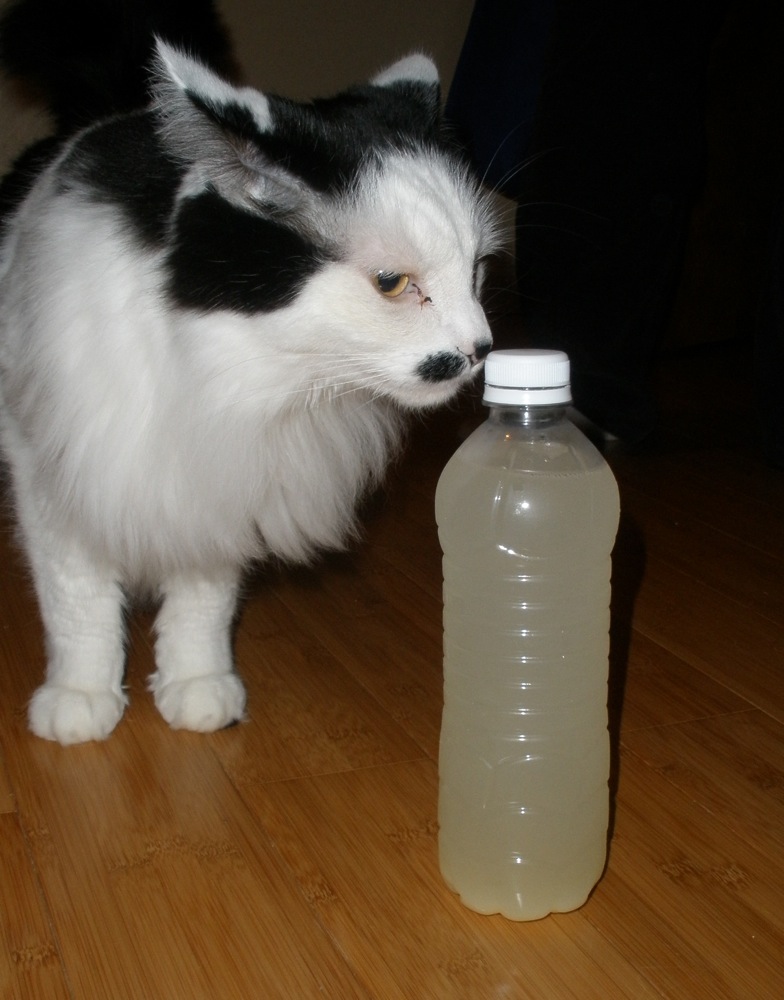
At the end of the day, I tossed them into my 'fridge.  I think they're still fermenting a tiny bit, but cooling them down pretty much stops the process.  And that's it, we've been enjoying them ever since.  Shawn has an addiction to sugary drinks so he loves them, and I love them because they are bottled in used bottles and are probably way better for him than the regular juice he buys.  Oh, and they're delicious.
This bottle of ginger beer is made much more interesting by the presence of Nikolai.

Wednesday, December 29, 2010

Everyone Loves Cheese

For my birthday last year, my sister got me a cheese making kit.  I love it, but I was always a little afraid of it.  I had read about cheese making disasters, and I HATE throwing food away, so it caused me to hesitate in trying my hand at it.  However, considering I have the time now, which I know will be limited later, I thought better now than ever.  In addition to reading through the instruction manual that came with my kit, I did some online research.  Of course, I found a ton of stuff, a lot of which was contradicting and confusing.  After some research and several youtube videos, I found that there are a lot of things that are called "cheese" and are all totally different.  The really easy stuff is barely cheese and more like cottage cheese; NOT the cheese that we all love.

After my research I decided to follow this website, because it didn't claim that cheese-making was "super easy" and it also explained things pretty well.  It gives a list of 7 cheeses to try to make from easiest to hardest and overall, looks pretty legit.  The first 2 "cheeses" it says to make are yogurt and labneh, but I decided to go straight to the rennet cheeses, since the other two aren't cheesy enough for me.

Ok, so here goes.  First, the milk.  I got a gallon of Twin Brook Creamery 2% milk (you know, the stuff that comes in those cool glass bottles?), some buttermilk, 1/8 tsp of CaCl, and dissolved 1/4 tablet of rennet in 1/4 cup of water.  I put the milk in a stainless steel pot and slowly heated it to 65 degrees.  Mind you, this doesn't take long since that's just room temp.  Getting it as close to the temp noted is key.  Get yourself a good thermometer.  Next I added the CaCl, then buttermilk, then rennet, stirring well each time in between the additions.  I took it off the heat, and let it sit overnight.

Just a pot of room temp milk.
Now it's really important to let the pot sit overnight undisturbed to let the magic happen.  I have a hard time with this sometimes and get too impatient with my food.  But this time, I was sleeping so it was ok.  Now, for anyone who has put any thought into making cheese and has done any research has definitely heard of the elusive "clean break."  This is when the solids have successfully curded.  Apparently this is hard to achieve and can only be done when all of the conditions are right.  Considering this is my first cheese making attempt, I was prepared for this to give me trouble.  BUT, when I woke up this morning and checked...
Ta daaaaaaa!  Perfection.  I did what I was supposed to do to check by sticking my finger in it at a 45 degree angle and pulled up.  The curds cracked like they are supposed to and the whey that filled in was clear.  Awesome.  This meant I could move on and cut the curds.


This is done by inserting a knife at a 45 degree angle and cutting all the way down to the bottom, making slices about an inch apart.  Turn the pot 90 degrees and do the same 4 times to get all sides.  Hopefully the picture helps to explain what I'm talking about.
 Now, take a piece of cheese cloth big enough to be able to fold it a couple times.  I used a piece that was big enough to fold twice in order to have a stack of 4 layers.  Lay the cloth in a colander over a bowl and ladle the curds into the cloth.  There were a lot more curds than I though there would be, so I had to do a lot of hand squeezing in order to get it all into my cheese cloth. 
Next, rig up some device that you'll be able to hang your cheese on.  Make sure there is a bowl underneath to catch the whey.  (Save the whey, there are a lot of things you can do with it.  It's apparently full of protein.)  This should hang for 12 hours.  (Or less if you're impatient like me and keep squeezing it every time you walk by.)  If you are going to wait, probably a good idea to keep it in the fridge for the 12 hours.

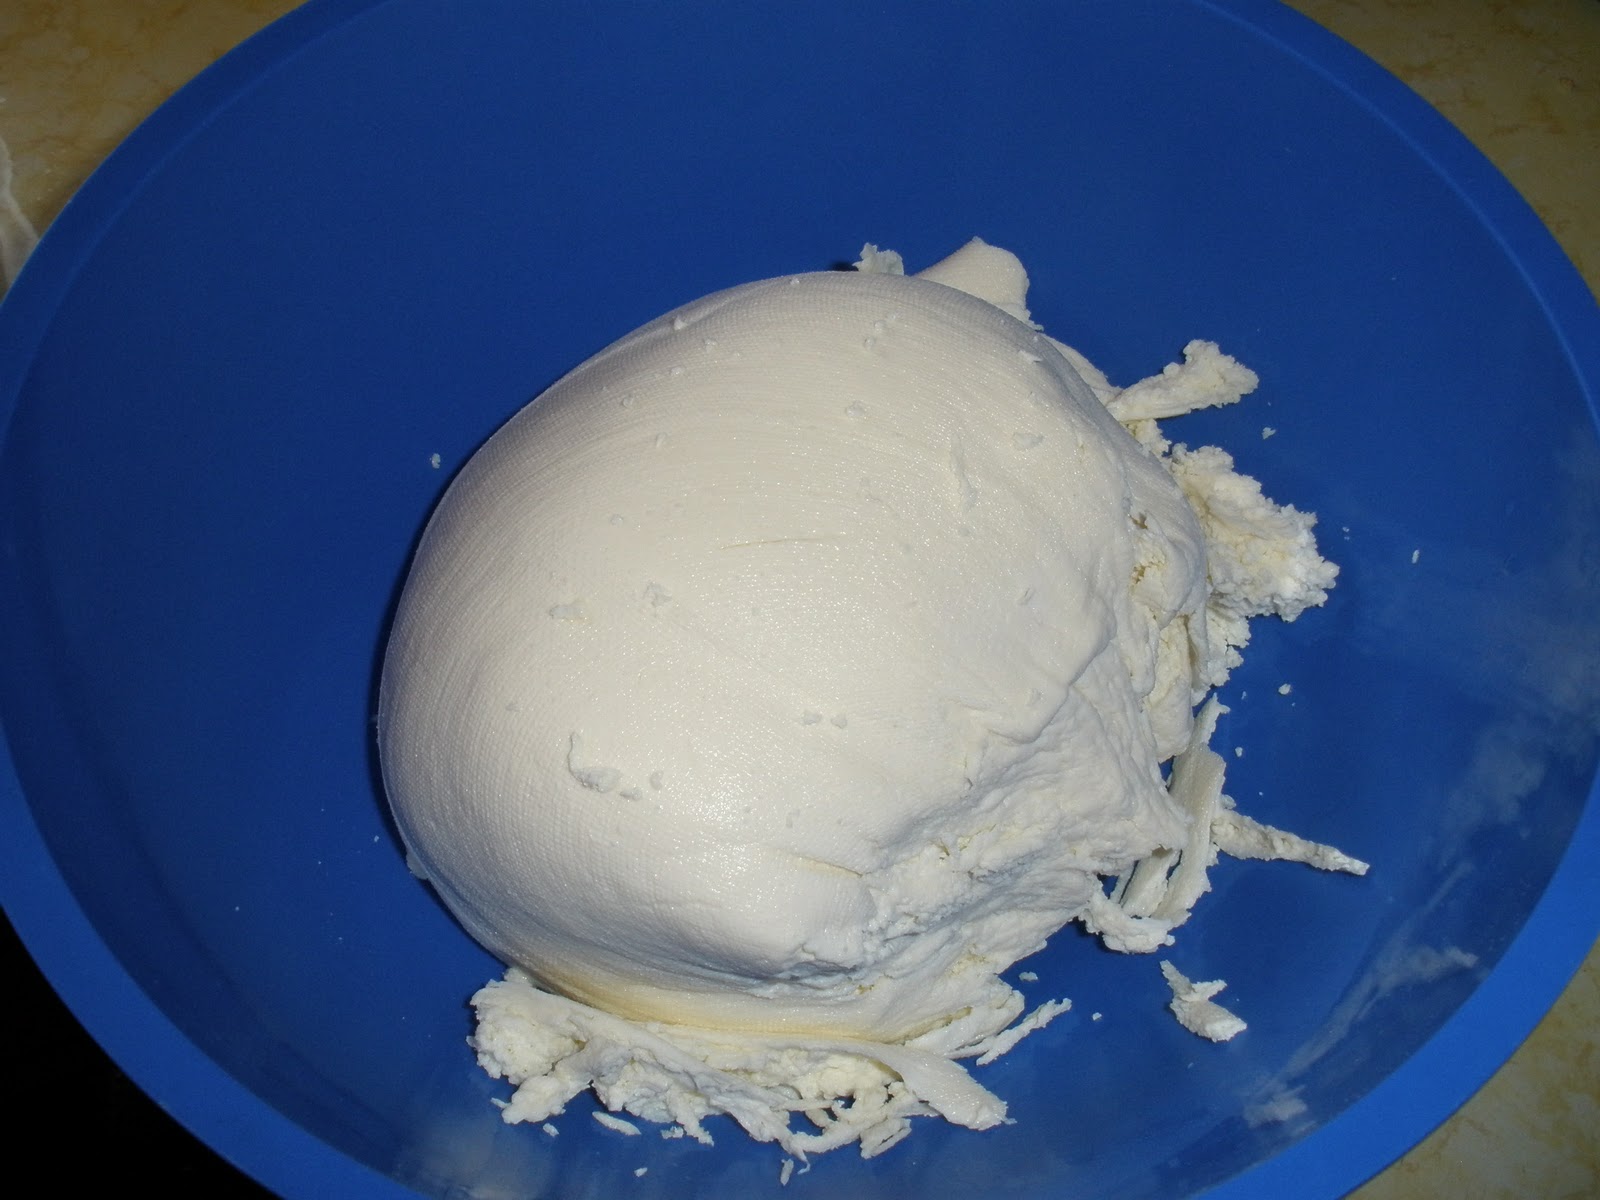
Once it has drained, it will look like this.  This is when you add the flavor.  You can add, garlic, herbs... whatever.  I kept it simple and mixed in 1 1/2 tsp of sea salt.  Once mixed in, I put it back into the cheese cloth, but this time in a round mold.  I set a bowl with a weight in it on top, to squeeze more liquid out.  (Sorry, no picture of this.)

And that's it!  Once you've waited as long as you can wait, and as much moisture as you wish is out of it, it's finished.  I took some to a dinner party tonight, along with some baguette slices that I made with some of the leftover whey.  (It's true, whey makes delicious bread.)  I took a quarter slice of my cheese and drizzled some olive oil and served it with a sprinkle of pepper.  Pretty gourmet, if I say so myself. 

So there you go.  Simple fresh cheese.  Like the website says, this is a good beginner cheese.  I'm happy it was a success and feel more confident to try my hand at the next step on the list.  Now what to do with all that whey...
Related Posts Plugin for WordPress, Blogger...