Showing posts with label DIY. Show all posts

Sunday, June 14, 2015

Little Green Trash Saver

This post is one that I've struggled with quite a bit. Each time I've attempted to write it, I've found my writing falling into the realm of preachy-ness and hypocrisy. I don't like it, and I know no one wants to read it. So keeping that in mind, here goes.

In the last several years, I have come to be really offended by trash, and products that create a lot of it. Trash is offensive to me two ways. The first is the fact that trash is useless STUFF that goes to a place to be STUFF until the end of time. That is the end of the line. The other thing is the fact that this STUFF is made out of resources. These resources are taken from the earth or are made by materials and energy taken from the earth. Not to sound super granola or anything, but we only have one earth and allowing ourselves to use up finite resources and space at the rate that we currently are seems rather silly to me. (And that's putting it lightly.)

For these reasons, there are a few things that are super popular on the market today that make me super sad; K-cups, styrofoam food containers, disposable plastic table cloths (and basically all other disposable party supplies,) just to name a few. In my opinion, these are nothing but trash-creating, ecological disasters in the making. Our need for convenience and time-saving has begun to take over not only our resources, but our beautiful land and pocketbooks as well. No matter what the market tells us, we don't need these things. We really don't.

Another example of a very popular product that falls into this category are pureed food pouches. It all started when apple sauce was put into little foil pouches with a screw on top that could be easily eaten by messy children without creating the mess. Now they take up half the baby food aisle, with all kinds of different flavors in fruit/veggie combinations.

They may be lighter and easier to transport than glass baby food jars (saving on fossil fuels, which is good) and a simple way to get a picky baby/toddler to eat their fruits and vegetables in a non-messy manner, but the trash it creates kind of makes me want to pull my hair out. Each one of those pouches has an active lifetime for, at most, 10 minutes. Then it becomes a useless piece of trash. And those things have GIANT screw on plastic tops to boot (which are made out of fossil fuels). None of this can be recycled. Sure, TerraCycle recycles them, but sending anything to TerraCycle is a pain in the ass, and most people haven't even heard of them, so at this point, it doesn't count.

But guess what? There are others who share my disgust for food pouches. These wonderful, ingenious people have invented reusable, refillable plastic food pouches. There are several different brands out there, but at our homestead, we use the Little Green Pouch. It has a similar large plastic screw-on top, a super strong zip top, and is dishwasher safe. It is BPA, phthalate, lead, and PVC free, and is made of a very sturdy material. I love it, and so does Eddy. She fell in love with it the first time I gave it to her full of apple sauce. She instinctively knew what to do, and loved the independence it gave her. (So for this reason, I totally understand the draw of the food pouch. It's a great way to feed kids and they learn to have some independence, which for moms, is something that we yearn for for our children. Win-win. I don't blame the mother at the grocery store who buys them a dozen or more at a time. I really don't. I just wish everyone knew about these reusable ones.)

I like to mix half plain and half flavored yogurts for a less sugary option.
Now every time Eddy sees one, she points at it and begs me to give it to her. The smile that spreads across her face when I pull one out is pretty sweet. The cool part is it can be filled with anything. Lately she's really been in to apple sauce and yogurt. I just buy large tubs of the stuff and fill the pouches in the morning and pack it in her lunch that she takes to daycare. Sure, I do have to wash them each night, but didn't I mention they are dishwasher safe? They don't take that much space in the dishwasher and it's a sacrifice I'm totally fine with making to prevent the creation of tons of garbage. Large jars of apple sauce and yogurt are recyclable, so there's ZERO trash that results from Eddy's weekly snacks. AND, buying things in bulk like this is WAY cheaper than buying individual pre-packaged sizes. So much winning.

The options of what to put into them are pretty endless. Eddy, like most toddlers, is not one to just eat her vegetables. So I, like most moms, have to think about ways to hide nutritious plants in the food that she likes. I always have ice cubes of pureed super greens in the freezer, so one of those mixed into pureed fruit is an easy way for Eddy to ingest some salad with her snack. We went to the Sounders game the other day and I packed a pouch-full of yogurt and apple sauce that she happily ate while cheering on the rave green.

Another benefit to the pouches we discovered when Eddy was prescribed antibiotics for an endless cough and runny nose. We struggled for the first several days getting the meds into her, with lots of crying, lots of fighting, and lots of meds being wasted as she spit them out. We basically ruined her trust for us. She didn't want to eat anything that came from a spoon, and foods that looked suspicious were out of the question. She mastered the eyes-closed, whiny, furious shaking of the head. We were all miserable. Then two things happened. We switched antibiotics to one that was less bitter, and I introduced the Little Green Pouch into the mix. I found that the meds were nearly flavorless in yogurt, and Eddy sucks down anything that's in one of those without thinking twice. That pouch came to the rescue and Eddy finished her round of of antibiotics with a smile on her face.

I can't say enough about these things. They bring Eddy an incredible amount of joy, and it's a joy that comes with nutrition and no trash. This brings be joy. When we're both joyful, life is excellent. Who doesn't want that?

So please, next time you're thinking about stocking up on food pouches, think about giving these a try. They do require a tiny bit more of your time and effort, but I think that's a small sacrifice we can all make to take care of our lovely little earth. It really is lovely.

They are an instant crying stopper as well.


Monday, January 12, 2015

The Fab Four!

O.M.G.

I haven't done a book review in ages, but this one's a good one to break the fast.

I was doing some Christmas shopping at Barnes and Noble and saw this little gem in the discount table. I picked it up thinking, "what a lovely little gift for myself!"

Salt, Lemons, Vinegar, and Baking Soda by Shea Zukowski.

I am already a huge fan of baking soda and vinegar as all purpose cleaners throughout my house. I rarely buy any cleaners and now come to think of it, I don't really know why I do at all. I use vinegar and BS (ha! BS!) so much that I buy vinegar by the gallon, and make special trips to Fred Meyer to buy the GIANT boxes of baking soda.

These two are just so great for so many things. Some of my regular uses include:
* Washing and conditioning my hair (baking soda and apple cider vinegar)
* Making a 50% water/vinegar solution and keeping it in a spray bottle for general cleaning purposes.
* Cleaning the toilet (both)
* Cleaning the bathroom sink (both)
* Cleaning and deodorizing the carpet in areas that Gus used to decide to relieve himself (both)
* Helping clear up a slow drain (both)
* Use as an ingredient in my home made laundry detergent (baking soda)
* Home made dryer sheets (vinegar)

I'm sure there's more, but I think you get the picture.

Now that we have a mobile little lady who loves to get into things, I'm even more happy about the fact that we have very little chemical cleaner presence in our home.

So you can imagine how excited I was to find this book. It has information (history, chemical makeup, etc.) on each of the four ingredients, as well as tons of recipes and other super cool uses for them. Obviously it's a super quick read and one that is awesome to just peruse when you have a few spare minutes. My favorite part about it is that every time I pick it up, I learn some new use for something that literally makes me say "whoaaaaaah, cool." Granted, I'm a giant dork so this is the kind of stuff that makes my wheels turn.

A few of the uses from the book that made me a little too excited when I read about them:
* Spraying your windshield down with a salt solution at night to prevent ice build-up, thus preventing the need to scrape your car on the morning. (Something we all hate.)
* Making a candle no-drip by soaking it in salt water overnight.
* Lemons are a natural stain remover. They can help get grass and sweat stains out of clothes, clean coffee and tea stains out of mugs, reduce age spots on your face, and add blond highlights to hair.
* Putting baking soda and/or salt on spills on the carpet or tablecloth can help prevent staining by neutralizing the substance and lifting it up out of the fibers.
* Adding a small amount of baking soda to the soil when planting tomato seedlings will help make the tomatoes sweeter.
* Spraying kids toys with vinegar as a natural disinfectant.
* Spraying seeds with a diluted vinegar solution will help with germination by preventing mold and mildew growth around the seed.

Oh, so cool. There's so much more too. I feel so inspired to fully embrace a chemical-free lifestyle. The best part about it is it's easy, and so frickin' cheap!

Ah, I love this book, and even more what it represents.

I don't often take selfies, but when I do, it's with really nerdy books.

Wednesday, December 17, 2014

Festive Invasive

I just realized I've been slacking on the holiday posts lately. Well, I've been slacking on all posts, but I feel like I have an pretty decent excuse.

But what I haven't been slacking on is finding super easy projects. First was the dryer sheets, then came the sauerkraut, now I'm here to tell you about my holiday holly wreath.

In past years, I've made what I call a "festive holiday door hang." Those were always really easy to whip together, but this time I wanted to try my hand at a wreath. Pinterest LOVES wreaths. Though I personally am not on Pinterest, (I know, shocking, isn't it?) I've noticed the wreath making mania that has struck the home decorator at large. Since I'd never made one myself, I didn't realize the fun that can be had when creating this super duper satisfying and easy project.

So we have this English holly tree in our yard. I hate it. Holly is horribly invasive and the awfulness is helped even more when the berries are carried all over the place by birds. Our yard is covered in holly seedlings and I'm constantly pulling them. Ugh. Did I mention that I hate it? The problem with this tree is that it's so old, it's like old growth. The trunk is at least 18 inches in diameter, and it's hugely tall. We haven't cut it down for several reasons: it's on the border between our neighbor's and our yards, it does house tons of birds, it keeps our house cool in the summer by shading it (yeah, that big), and cutting it down won't kill it anyway.

But once a year during the holidays, I'm glad we have it.

Shawn did some pruning while cleaning the gutters a few weeks back and I took what he cut and decided to try my hand at this whole wreath-making business that everyone on Pinterest seems so excited about.

For the frame, I just took a wire hanger and stretched it out into a circle, leaving the hook as is. Next, I cut about 6-8 inch pieces of the nicest-looking parts of the holly. I think I cut about 60 pieces total, making sure to get some pieces with berries, and others with just the lush, waxy green leaves. The nice part about having an old growth holly tree is that when they get that big, they lose the need to make spiky leaves. So it was nice to not have to worry about injuring myself.  Next, I cut longer pieces of twine and tied the pieces in bunches of three. Using the ends of the twine that was left, I then tied the bunches into the hanger in two places to keep them in place. Making sure that the nicest sides were facing out with the berries scattered nicely, I just tied the rest of the bunches on the same way, all facing the same direction. I added a gold bow to finish it off, and ta-daa!

This took me a total of a little over an hour, from start to finish.

I really like it.
I think I understand this whole wreath making thing.

Happy holidays everybody. May this world be a little more peaceful. Now go hug your people.

Tuesday, December 9, 2014

Babies Want Good Food Too

When Eddy was 4 months old, we began our baby food feeding journey. I was really excited. I have always thought most people fall into two categories: People who eat to live, and people who live to eat. I, by the way, am part of the live to eat team. Food is so delicious. I wake up in the morning thinking about what I'm going to eat for breakfast, and I eat lunch thinking about what's for dinner. Having a delicious lunch waiting for you makes any work morning more pleasurable.

Food is also a huge part of my family. We, to this day continue to get together for family meals on an almost weekly basis (adding chairs as new additions come into the fam,) and any and all reasons to celebrate any achievement by any family member is a reason to get together for a delicious meal. (Followed by delicious dessert as well. Life is short. Eat dessert. That's a whole separate blog post.)

Food is culture, food is happiness, food brings us together. Food. Is. So. Delicious.

So introducing Eddy to the thing that brings me daily happiness was something I was really looking forward to.

Surprisingly, it was tough going at first. We started with rice cereal, which to this day she still won't eat, and slowly started trying pureed fruits at five months. There were a few things we learned in the beginning:

1) Babies have a hard time with chunks. We tried to give her some mashed well-cooked carrot, but even the tiniest chunk of carrot was too much for her, and she barfed all over herself. We have some hilarious video of that. Sorry, Eddy.
2) Spoons are foreign objects that babies generally don't want in their mouths, regardless of how much deliciousness is on the end of it.
3) Sweet things are far more desirable to non-sweet things.
4) Eating is hard and you have to take it slow.

But we persevered and kept trying everyday. The first thing she started eating willingly from a spoon was pear baby food. Then she decided she liked pureed peaches and other fruits. But even with this, she would only eat a few bites willingly, then glue her lips together and no amount of goofing around we did for her resulted in her wanting any more. Trying to keep the whole eating experience a positive one, we didn't push it too much.

During this phase, I bought several jars of baby food just for research purposes. I wanted to see what flavors Eddy liked, as well as taste it myself and check out the consistency. Once I got the info I needed, it was time to make my own. First, I pureed simple-flavored fruits and vegetables and froze them in ice cube trays to keep them in easy portions. Once frozen, I would pop them out and keep them in ziplock bags. I didn't realize at the time how helpful this would be in the future.

Clockwise from top: Pureed yam, peas, apple/pear, spinach, beet/carrot/spinach, peach in center.
When it came time to eat, I would pull out a cube or two, thaw, and heat 'till warm. She was always more willing to eat the fruit purees, but the peas I had to mix with apples or sweet potato for her to eat. She seemed to like them ok, but she really never got enthusiastic about them. Though it made me feel bad to do it, we were washing at least half of what we prepared for her down the drain. (Maybe about an ice cube's worth of food, so not much, but I still felt bad.)

Then at about 6-7 months, we discovered that she would rather feed herself. She liked trying to pick stuff up on her own, and even though the food rarely actually made it into her mouth in the beginning, she liked practicing using her hands. So we gave her soft slices of pear, avocado, and CHEERIOS! Cheerios are a magical food, I tell ya. At about this time, we also discovered that she enjoyed eating small bits of food from our fingers. Whenever we would offer something to her from our hands, she would open up eagerly. This also allowed her to start practicing her chewing motion. She didn't have any teeth yet, but the act of chewing something small helped with swallowing smaller chunks of food. We were giving her tiny pieces of banana, beans, and carrot and she was liking it. (And we were happy that chunks were no longer a catalyst for barfing.)

So we slogged along and still kept trying spoon feeding, since that was the only way she would actually get any amount of food into her mouth. She was occasionally having good feeds, but mostly only eating a handful of bites at each meal along with a few Cheerios. The thing that changed it all was a combination of the appearance of her first teeth at 7 months, and me cooking some real food for her. I found some turkey patties in the back of my freezer, and decided to fix them up for a quick weeknight dinner. I used about a quarter of a patty and pureed it with some cooked butternut squash, a couple frozen cubes of sweet potato and one cube of apples and pears for some added sweetness. That's it. I cooked it all up together in a small saucepan and then blended it with an emersion blender. I froze it into small meal portions in a silicone baby food freezer tray that my mom got me.

Dude, this stuff was so good, I would have eaten a whole bowl of it for myself. I think it helped that the turkey patty was just slightly seasoned.

So this made me think: I'll bet Eddy isn't into eating real food because we really aren't offering her real flavors. Maybe instead of one ingredient, she prefers combinations of flavors. We like different flavors, right? Wouldn't we rather eat food with real flavors and some seasonings than plain steamed vegetables? I know in the beginning it was important to start with really simple flavors to get her into the whole eating thing, but I think breastfeeding helped in getting her palate ready for more complex flavors.

So now my new favorite pastime is to make gourmet baby food. This is where I've found my simple ice cubes of pureed ingredients so helpful. They are perfect ingredients that are all ready for me to combine to make tasty baby food. Since she liked the squash/turkey concoction so much, I looked for other ways to mix vegetables and proteins. The second recipe I created was a tomato basil chicken soup. It included onions, tomatoes, basil, a cube of spinach, and chicken, all cooked and pureed together with some water, and a sprinkle of rice cereal to thicken it up.

The third recipe I came up with was a spaghetti squash tofu curry. First I heated up some leftover spaghetti squash from our dinner the night before. Then I added some silken tofu and a cube of purred apples and pear and mashed it up. For seasonings I used a few dashes of curry, some onion powder and just a tiny bit of garlic salt. My immersion blender came in handy again here as well.

So much ready to eat food!
Seriously. Eddy doesn't know how good she has it. I make sure to taste everything I make for her. I always add the least amount of salt as possible, but I also think that you really need some to let the sweetness of other flavors come through. If it passes my "I would eat it" test, then I know she will too. (Side note: I'm seriously thinking about writing a baby food cookbook with these recipes. Do you think there's a market for it?)

All of these soups I generally make for her to take to daycare. She's finally up to eating three times a day now so that packing a lunch with her bottles has become necessary in the last couple weeks. Sometimes she eats them for dinner, but usually we try to make a version of what we're eating available to her. A baby food mill makes almost any food that we are eating an option for molar-less little ones as well.

Oh, how we love you little Milly.
This sucker can instantly turn almost any food into baby food. When I am cooking, I pull out the various ingredients for her portion before I add the final seasonings that might be too much for her like salt and spicy stuff, or I wash off some of the sauce before grinding it to prevent her from getting too much sodium in her diet. Otherwise, she eats what we eat. Gotta get that habit started early, folks. Here is the list of deliciousness Eddy has enjoyed recently:

* Japanese curry rice
* Thanksgiving leftover turkey sandwiches
* Portuguese bean soup
* Creamy pasta with salmon and peas
* Lentil soup
* Roasted veggies

In conclusion... Yes, I have put a lot of effort into feeding Eddy. Like breastfeeding, this has been more work and a lot harder than I was prepared for, but it's something that is super important to me. I want her to enjoy good, wholesome food as much as I do, and not become one of those kids who only eats hot dogs and mac and cheese. It's for her health, my sanity, and really... food. Mmmm.

Yummy food = Happy baby!

Monday, November 10, 2014

Quick Homemade Dryer Sheets

So it's flannel sheet season.

While Eddy was napping this afternoon, I decided that it was time to give our bed the winter makeover. I pulled the flannel sheets from the linen closet, only to be greeted by sheets that just smelled funky. Like closet. They're clean so I didn't feel the need to wash them again, but I felt like they needed a quick romp in the dryer with a dryer sheet.

There was one problem. I don't have dryer sheets. I haven't bought them in years. I don't really know what's on them and since Shawn and I both have sensitive skin, I just tend to avoid them.

But I still needed something to get the closet smell out. So, to the internet I went, and found some info on homemade dryer sheets.

Holy cow, this may be the quickest project in Urban Hobby Homesteader history.

Ready?

Find some fabric you can cut up. This could be an old t-shirt, or in my case, a crappy dollar store dish towel that has been sitting in my closet for years without use. You will also need some white vinegar, essential oils of your choice, and a container to put it in (I chose an old peanut butter jar.)

First cut up the fabric into dryer sheet-sized pieces. Mix a quarter cup of vinegar with 5 drops of essential oil (tea tree in my case) into your container and shake it up. Add the fabric and they're ready. You can make more solution when you need it and reuse the pieces of fabric by throwing them back in the jar.

My staging skills leave a bit to be desired, but you get the picture.
Non-toxic, no waste, super cheap, and smells good. Everyone wins.

And to end, here's Eddy in her Halloween costume jammies - NASA astronaut!

Frickin' adorable.

Monday, August 25, 2014

Easy, Recycled Fire Pit

Shawn has always wanted a fire pit for our backyard. Every time we saw one for sale at Fred Meyer or Costco or H-Dizzle, he would stare longingly at it and we would walk away saying "someday..." We never bought one for several reasons: price, timing, and just not wanting to buy something that was cheaply made in China.

Well, his wish finally came true on Father's Day when I built him a fire pit from recycled cinder blocks. My sister's hubby was in the process of taking apart an old fish pond that they acquired when they bought their house which resulted in lots of cinder blocks. They also had mortar on them that needed to be chipped off.

So the boys secretly kidnapped Shawn to go watch a World Cup game at a bar and my sister and I equipped ourselves with some hammers and crow bars and got to work.

Dude, chipping all that mortar off was hard work! But we did it, feeling rather proud of ourselves.

We are woman!!!
Once we got all the mortar off, the assembly was a cinch. One paver stone was stacked on each cinder block that was arranged in a hexagon and, ta daa! Fire pit. 

My original plan was to glue the paver stones onto the cinder blocks but I haven't done it yet. I don't know if it actually needs it, to be honest.

Fire. Pit.
Cleaning it out will be easy too since the cinder blocks aren't glued to the ground.

Well, as you can see, this was constructed several months ago. You're seeing this post now because Shawn finally got a chance to use it this weekend.

Happy husband.

Tuesday, April 15, 2014

Hoopin' it Up

The greenhouse that I salvaged last year finally died. So we were faced with the decision to buy something that's going to die again or go for a different system. We went for the new system.

Turns out this new system is way cheaper and will probably last a lot longer.

So grandma Kathy was called to babysit and garden season 2014 commenced. (Better late than never, huh?)

I've always wanted to build a hoop house since it is like a greenhouse for plants that are already in the ground. This gives plants like tomatoes and peppers a chance in our cooler, shorter summers. Also, early in the season, it can be used as a greenhouse for starting seeds.

Here was our supply list:
*10ft 1/2 inch pvc piping (x4)
*PVC clamps (x8)
*Screws (x8)
*Garden cloth (10ft x 12ft)
*Random bits of long wood (two 8 ft poles-worth. 2x2's or crown molding works great.)
*A few bricks (or other heavy items to keep the sides down)
*Some clothes pins or other pinchy things to close the ends
*Staple gun
*Screw driver

I think we spent about $25-$30 on the supplies to cover a 4ft by 8ft area of one of our garden boxes.

The building part was a cinch. First we stuck the two ends of each PVC pipe into the edges of the garden box and secured them to the sides with the clamps and screws. Then I scrounged my wood pile and found some old pieces of trellis and wrapped the edges if the garden cloth around them and stapled them down. This makes it easier for one person to cover the hoop house on a windy day because they act as a bit of a weight and pulls the whole cloth over at once. I also put a few bricks down on top of the wood to really secure it. Then I gathered the cloth at each end and closed them up with some clothes pins. We chose to go with the cloth over clear plastic because plastic is gross and the cloth also breathes just a little bit, which results in not as much heat being trapped in. This also prevents overheating when we forget to open it up on a hot summer day, which I have been known to do.

Open...
and closed.
Keeping the seeds (and Gus) warm.
I plan on putting my peppers, eggplant, and tomato plants in here. (Once I get my hands on some starts...)

Oh, and we finally were able to harvest some chicken shit compost. My dad and Shawn did some heavy digging in the compost pile and harvested about two garbage can fulls of super compost which was filled with worms (which the chickens enjoyed immensely. Sorry worms.) A nice layer of it was turned into the soil, so I have high hopes for our harvest this year.
 
I've also seeded for kale, bok choy, peas, cilantro, and potatoes, all under a another sheet of the garden cloth. It works great to keep the soil just warm enough to speed up germination. I still have a lot more to plant. Even though I'm home all day, it's really hard to find the time to go out and work in the garden without a babysitter because it turns out babies don't really like to be put down, and wearing a baby on the front makes bending down to plant stuff really difficult.

Hopefully I haven't started all this too late in the season.

Finally, here's Eddy enjoying the fresh air while we were working. Seriously. Adorbs. Totes cray-cray adorbs.

Saturday, February 1, 2014

Don't Procrastinate. It's Expensive.

We got a water bill statement in the mail the other day that made my eyeballs pop out of my head.  It wasn't necessarily the amount that our bill came to, but it was actually the little bar graph that compares your consumption to what it was last year during the same month or two.  I realized that for the last several billing cycles, our consumption has doubled since the year before.  Wha....???

Weird, huh?  I thought so to.  After thinking about it for a moment, I couldn't really pinpoint how we've been using so much water.  Overall we're pretty conservative in our water use.  Especially me.  I'm always super conscious about how much water I'm using while washing dishes, making sure that the dishwasher and washing machine are full before starting them, and even follow the "if it's yellow, let it mellow" rule.  AND, it's not gardening season, so there's no way I'm using extra water outside.

Then my mind went to our bathroom.  Since we moved in, I've occasionally noticed our toilet running.  I didn't give too much thought to it, it would just run for a few seconds here and there.  But now that I was actually putting some thought into it, I realized that perhaps it had been getting worse and running more often recently.  It was just one of those things that I didn't notice because it was a sound I had gotten so used to and just didn't realize it was getting worse.  After 10 minutes of searching the intertubes, I decided it was a leaky flapper in the tank that needed to be replaced.

So off to H-Dizzle we went.  We picked up a new flapper and also decided to get a new aerator for our sink.  The aerator we had was one that dispensed 2 gallons of water per minute and we decided to upgrade to one that dispenses half that much.  The total bill for these things came to $11.

We got home and the installation for both took literally 5 minutes total.

Then we waited.  Two months we waited.  With baited breath.

And today it came.  The bill to decide it all.  See below:

BOOYAH!!!
Let's break this down.  Like the graph states, the dark line is this year, the white line is last year.  This cycle, since our super easy and cheap bathroom modifications, we've cut our usage in half.  Damn.  It's even a little lower than the amount we used last year at this time.  AND, this includes the increased loads of laundry we've done to wash baby stuff to get ready for her arrival in the next month.  (Yeah, one month.  Scary.)

So an $11 fix that took a quick trip to the store and five minutes at home lowered our bill by $22 and cut our usage in half.  We're pretty pumped.

Do you have something that needs to be fixed?  Do it.  It feels so good and will save you money and save the earth a little bit too.

Saturday, April 27, 2013

Wren House

Look at Shawn's project!  Isn't it adorable?  He's been talking about making a birdhouse for a while now, and last weekend, he suddenly just jumped up off the couch and declared, "I'm going to make a bird house."

So he did.

He looked up some plans on google, and after weighing the options, decided on the wren house.  (It's also suited for chickadees.)  Then he went through our scrap plywood pile and found some random pieces that were roughly the same thickness and went to measuring and cutting.

We just got a new hand saw that cuts really well so I think that helped in the motivation.  And we were tired of being cooped up in the house.

I helped a bit with the nailing together because it required more than two hands, but other than that, from start to finish this was all his own project.  It was so easy and quick, I think we're going to have  a few more birdhouses popping up around our yard in the next few weeks.

He painted it the same color of our house so it blends in.  We'll see if the wrens like that or not.


Here it is right next to one of our windows so we can spy on them.  We've seen chickadees checking it out here and there.  I hope someone moves in soon!


Oh, and here's a house finch and northern flicker in our front yard just for good measure.


Monday, April 8, 2013

Buzz Buzz

You hear a lot these days about the plight of the poor old honey bee.  They are dying by the billions due to pesticides, herbicides, and global warming... all that bad stuff that humans are creating.  Along with these horrifying tales you also hear bits and pieces about how important bees are to our survival.  As the main pollinators of plants that produce the fruit and vegetables that we consume each and every day, the collapse of the bee population is no good for us.

One of my dreams is to keep honey bees.  The rewards are many: happy pollinators for 16 miles around (that's how far they can go), fresh honey, and good feelings of helping an important species thrive.

But I haven't gotten around to that yet.  It seems like a lot of work, and to be honest, the idea of getting stung enough times until the bees get used to your scent is not a sacrifice I am willing to hurdle just yet.

So I'm doing the next best thing.

Mason bees.  Have you heard of them?  They're super cool and a great species to welcome into your garden for those less willing to endure the pain of honey bees.

Mason bees, also called orchard bees, are solitary, meaning they don't have colonies and all females are fertile.  They lay their eggs in beetle holes made in logs or hollow twigs.  They are great pollinators and the best part is that they don't sting unless they get squeezed.  They are safe to be around and are just as good at pollinating your plants and fruit trees as honey bees.

Oh man, they're so cool.  Read the article regarding how they lay their eggs.  Why is nature so amazing?

So Shawn and I made some Mason bee homes this weekend.

It's so easy, you can do it too.

First we found an old weathered 4x4 and some pieces of plywood from our old scrap wood pile.  Next we cut 2 pieces of the plywood: one for the back of the house which will be used to anchor the house to the fence, and one for the roof.  Then we cut a piece of the 4x4 off at an angle so that the roof part would be slightly slanted for rainwater runoff.  Then we drilled a bunch of holes into one side of the 4x4, 3 and 1/4 inches deep, using a 5/16 in. drill bit.  Then we screwed on the back and the roof and we were finished.  We attached it to a fence post next to our garden boxes where it will get lots of sun, and stood back and admired our handy work.


Very little measuring went into this project.  You can get much prettier mason bee houses for $30 at nurseries but this one was free AND made out of scrap materials.

We did make one mistake though.  After we had made three of these, we realized that the 4x4 we used was cedar.  Cedar has a strong odor that repels insects.  Luckily, it was a weathered piece of wood and I think after a year of so being in the weather again, the holes will eventually lose their smelly-ness.  So hopefully next year we will have some renters.  So if you're going to do this, make sure you use hemlock or fir instead of cedar.


They're so easy to make, we'll probably be making more here in the near future.  Using the correct materials, of course. 

Friday, December 7, 2012

Decking the Cottage

I LOVE Christmas.  Love love love it.  I love the lights, the family, the food, the colors, the happiness, the joy, the presents, the decor... I could go on. 

On the Saturday after Thanksgiving, the hubs and I had a revelation that not only would this be our first Christmas together as a hitched duo, but it is also the first time we have our own place to deck with all the glory that is the holidays. 

So off we went. 

First Shawn put up lights around the house.  Just a few colorful strands lining the front of the house and roof and some running down the gutter next to our front door.  Sure, it's not anything people will ooh and aah at, but we do.  Every time we drive up at night we make sure to remark, "why look at this charming little cottage.  How lovely."  It's fun.

Our little cottage was made even more lovely by our additions last weekend.  First, we bought a little tree.  My family rarely did the whole live Christmas tree thing so getting a live tree is a big deal to me.  But we figured this was a special occasion.  It's a smaller one, just 5 feet tall, and nice and skinny so it doesn't take up too much space in our tiny living room.  We decorated it with all the ornaments from both our childhoods.  It's kind of perfect.

The other thing I did was make a holiday bouquet to hang on the door.  Shawn kind of wanted a wreath but we didn't really want to pay for anything else (other than the tree) that was going to die.  So I got the idea that maybe I would make something festive.

First I started with a pile of branches carefully selected from around my house.  Some pine, juniper, 2 kinds of fir, some holly complete with berries, and cedar.  I also found a pine cone along the interurban trail behind my house for an accent.

Way more that I needed.
Then I arranged them on the floor in a nice array.  I'm no florist, so I did the best I could.

I had a lot left over.
Then I banded them tightly with a rubber band including the pine cone.

The stems will all be different lengths but they can be cut after they're banded.
Next I made a festive bow out of some ribbon and tied that around the top to conceal the rubber band.

Thicker ribbon would have made a prettier bow, but it's all I had.
That's it.  Hang it on the door and all your guests will be greeted with a nice, fresh-smelling piece of festive fun.  I really like the word festive.  Can you tell?


There's nothing better than sitting in front of the fire, surrounded by the smell of a live Christmas tree, watching some great BBC programming.  It really helps in getting through the sad, cold, dark, wet Seattle winter.

Saturday, September 29, 2012

Chicken Run Awesomeness

We built it.  (A few months ago, but I've been busy.)  It's amazing.  I'm so proud.

We started with MY OWN DESIGN.  (I say as I puff my chest.)  There were few designs of runs that I found that I liked so I tried my hand at designing.

There were a few parameters that I knew I was going to work with:
* It had to be tall enough for us to somewhat stand up in.
* It would be made out of 2x2's.
* It would be light.
* Predator proof.
* Bigger than the old run.
* The doors had to be easy to open and close.

So I got to drawing.  I drew out several rough draft plans.  Some changes and redrafts had to be made based on how long the treated 2x2's were that were sold at Lowes (not sold at Home Depot), how tall it needed to be for us to kind of stand in it, blah blah blah, including some of my own brain farts that I discovered along the way.

After several weeks of drawing and thinking and examining the blueprints in my brain, we decided to go shopping for supplies.  Here is what we bought on the first run:

*12 8ft treated 2x2's
*A box of galvanized 2.5 in nails.
*3 8ft x 26in corrugated pvc panels.

This totaled about a hundred bucks.

The building process went as follows:

Build the frame for the floor.  Line with poultry netting to predator-proof.


Then make the walls, keeping in mind how wide the poultry netting is, and how it will be tacked in, as well as where doors are going to go.  We were lucky to only have to make three walls instead of four because the coop would act as the fourth.


Short wall.
Tall wall.  The small area underneath the netting is for the chicken-access door.
Attach the walls to the floor.


This is upside down.
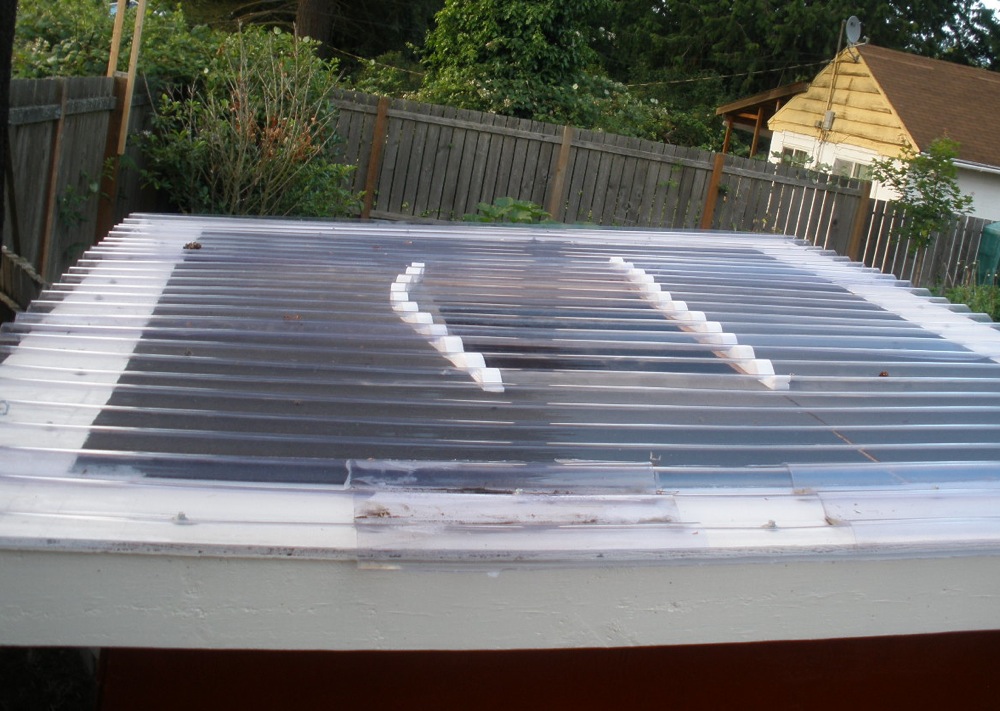
Put on the roof.  We had to cut the three pieces of PVC a little shorter, but as far as the width goes, the three pieces fit perfectly, including some overlap to make sure it wasn't leaky.  Poor Shawn gave himself some bloody knuckles screwing in all the screws, but we made sure it was on nice and tight to keep the ladies dry once the rains start.  Then we attached the doors, for both humans and chickens.  We got a really cool latch from the ReStore that I'm really excited about.  (That might be my favorite part of the run :))


The human door in the middle and the chickie access door to the bottom left.
Then all we had to do was attach it to the coop and ta-da!!!

They look so good in there, huh?
In the middle of construction we had to go buy 4 more 2x2's due to my lack of planning but that was it.  Most of the hardware was stuff we had leftover from coop construction.  So the whole run cost us just about $120. 

So in conclusion, on the whole, our chicken housing cost us $400, plus some labor.  We got exactly what we wanted in a chicken house and provided ample space for the ladies to hang out.  I just hope that it does well in the winter... though I already know that we won't have nearly the same flooding problems we had with the last place. 

Finally, to prove how awesome we are, please refer to exhibit A and B.

That is all.  We rock.

P.S.  I know that this post is not complete enough for someone to come along and build what we did based on what I have written.  Please let me know if you'd like more info and I would be happy to share more details with you.  Just leave a comment below with your email and we can totally chat!

Sunday, September 16, 2012

Slappin' it together.

I think building a legit chicken coop has made us pretty confident in the power of a hammer and nail.  'Cause when we realized we needed a compost bin, we slapped one together like it was easy as pie. 

In the old place, we had a corner of our yard that had a concrete wall that was perfect for a compost pile.  It was pretty big, and made it really easy to just toss whatever we needed composted into the corner.  It was accessible to the ladies to turn it while looking for worms, which made it a pretty good system.

Unfortunately, the new place has no such corner.  So we had to build a compost bin.  We though about buying one, but they're pretty expensive.

We started with a piece of grape stake fencing that we originally picked up as possible material to build the coop.  It was pretty old and rotten on the edges, so we cut off the ends of the vertical slats down to the 2x4 cross pieces.  This got rid of the rotten parts while maintaining stability.

Brackets, random pieces of plywood, nails, screws...
Then we cut the whole thing into 3 pieces to make the back and 2 sides of the box.  Those were secured together with random brackets and things we had lying around.

We really just slapped it together.  It's pretty rickety.  I wouldn't trust the stability even for a doghouse.
At this point we decided to move it to it's permanent home since it was still light enough to move.  But in order to do that, we needed to do some concrete work.  I had never laid any concrete, but Shawn had, and my dad is quite the home concrete-laying veteran, so we were able to pour a slab down in no time.  We decided a concrete slab was necessary since on the other side of the fence is a veritable wall of blackberry bushes that I wanted to prevent from growing into my compost. 

And what happened right after we poured it?  The cats walked in it of course!!!
Once the stab was dry and set 2 days later, we moved the incomplete bin to it's final destination.  I was a little sad to say goodbye to the cute little kitty footprints.

Next we tacked on a piece of plywood 10 inches from the bottom to create the front wall.  A second piece of plywood was cut to (semi) fit the bottom part.  This way, instead of digging down to the finished compost next year, we would have a door for instant access to the black gold when we need it.  The door is made so that it can be slid in and out (up and down).  This was done by tacking on two small pieces of wood into each corner to hold the board in place.  The current board we're using isn't quite the right size, and we do have some plywood that we can cut to fit, but we'll get to fixing that when we get around to it.  The key was getting this whole thing made quickly so we could actually put stuff in it, since chickens keep pooping whether you have a compost bin or not.

This was a few weeks ago.  It's way fuller now.
The last part of construction was to attach a roof to the top with some hinges so we can easily open it up and drop stuff inside.  The plywood we used for the roof is pretty thin so it's really easy to open it with your elbow when you have a handfull of stuff you need to throw in. 

So there you go.  Who knows how long the actual bin will last, but for now we have a place to put all the chicken crap, garden garbage, and food scraps.  We've been watering it down every few weeks to maintain moisture and promote decomposition, and we'll probably turn it here soon to see how things are looking towards the bottom.  I'm happy to say that all the materials that went into the construction of this bin was stuff we had lying around so basically we got a compost bin for free, plus some elbow grease.  Oh wait, we did have to buy the concrete.  So we got a compost bin for $15 plus some elbow grease.  Still a good deal.

Sunday, July 22, 2012

Chicken Coops: 3rd time's the charm

Moving is hard.  For anybody.  There were aspects of our move that made the whole process easier; the new place being only 7 minutes away, plus the major overlap in when we could move in to the new place and when we had to be out of the old place.  But there were also aspects that made the move more complicated, the biggest one being the chickens.

We were ready to move as soon as the wedding was over.  However, the ladies were not.  And they wouldn't be until we built them a new home.  I may have mentioned my stress about having to build a new coop (again), but thanks to my husband's major internet research skills we stumbled upon a coop plan that was free, simple, and easy to build.  It was exactly what we wanted.

Once we found the plan, I felt like half the job was already done.  This is also when I got excited because we're not carpenters, but this was a chance for us to build something legitimate to test out our skills.  I pored over the plans for several days, trying to figure out what materials we needed to purchase, including the tweaks that I decided were needed to build the coop to our specific needs.

The plan in its original form, resulted in a 4ft x 4ft coop.  I felt like it needed to be a tad larger so we decided to build a 4ft x 5ft coop instead.  We also put the nest box closer to the floor and cut the door in a different place.  We had some old shelving that my dad saved so we were going to use that for the flooring instead of plywood, and the roof pieces needed to be cut into different pieces than the plan to maximize efficiency in the usage of expensive plywood.  But other than that, we stuck to the plan pretty closely, which was pretty good since I have a habit of straying from plans.

Once I figured all that out, to Home Depot we went.  Our original purchase of all the lumber plus some corrugated roofing, hooks, and hinges equaled about $230.  Luckily we already had the above-mentioned flooring plus a bunch of nails and all the tools from my dad's supply.

Then it was time to measure twice, cut once, and start hammerin'.

First the frame needed to be built...

The frame: super easy construction.
...then we stapled some chicken wire to the bottom and three sides of the underneath run for predator-proofing purposes.  (See pics below.)

Then we decided to move it to its final resting spot in the back of the yard because carrying a heavy coop didn't seem fun.  This required a bit of leveling by digging down to lower one side.

The flooring was then nailed down, and then it was time to work on the walls.  The plywood was first cut into the correct pieces, then the holes for the door and nesting box was cut.  The plywood was then tacked into the frame with a bunch of nails.

Looking in from the back.

Nest boxes.
My brain worked overtime in figuring out the nesting box dimensions since I noticed there was a typo/miscalculation in the original plan.  But, I was able to figure it out and it came out nicely.

Then it was time to work on the roof.  I assembled most of it on my own since Shawn and my work schedules were hard to coordinate, so he had cut all the necessary pieces a day earlier to make it easy on me.  The plans result in a roof with a skylight so that the ladies will get as much daylight as is available which is a huge improvement from their last coop.

Unfortunately, I made the inside panels of the roof a bit too narrow, so when it came time to attaching it to the structure, we found that it was off by a half an inch.  So we had to take it apart to fix it.  It was a pain, but it had to be done, and proves that you can never measure something too many times. :)

Once the roof was fixed and attached, we were left with the final touches.  Hinges and doors, the roosting pole, the corrugated roofing, hooks, etc.

Painting is fun!
Then it was time to paint!!!  Luckily we had this super awesome barn red color left in the garage of the new place so we decided to go big or go home.  The white was leftover from my parents house so zero $ was spent on paint.  Our kid friends next door were super eager to help us out with the painting, which resulted in some paint ending up in random places.

We did have to take some emergency Home Depot trips for random extra supplies, so including those, the coop itself cost a total of about $280.  Pretty good for a nice coop, we think.

Our next step is to build the run.  For now, we have a very sketchy run that we put together using the old run we built for the babies last year and some random boards hammered together.  Building a run that is really predator proof is our next big project.  Until then, I'll have daily heart attacks as I worry about the ladies being eaten by racoons.

Here are some more pictures of our finished product:

Sky light from the top.
Sky light from the inside.
Back door closed.
Back door open.
The setup inside.
The set up outside.
We're pretty proud of the whole thing.  The ladies seem to like it too.
Related Posts Plugin for WordPress, Blogger...